Register a Client with Google
Create a project:
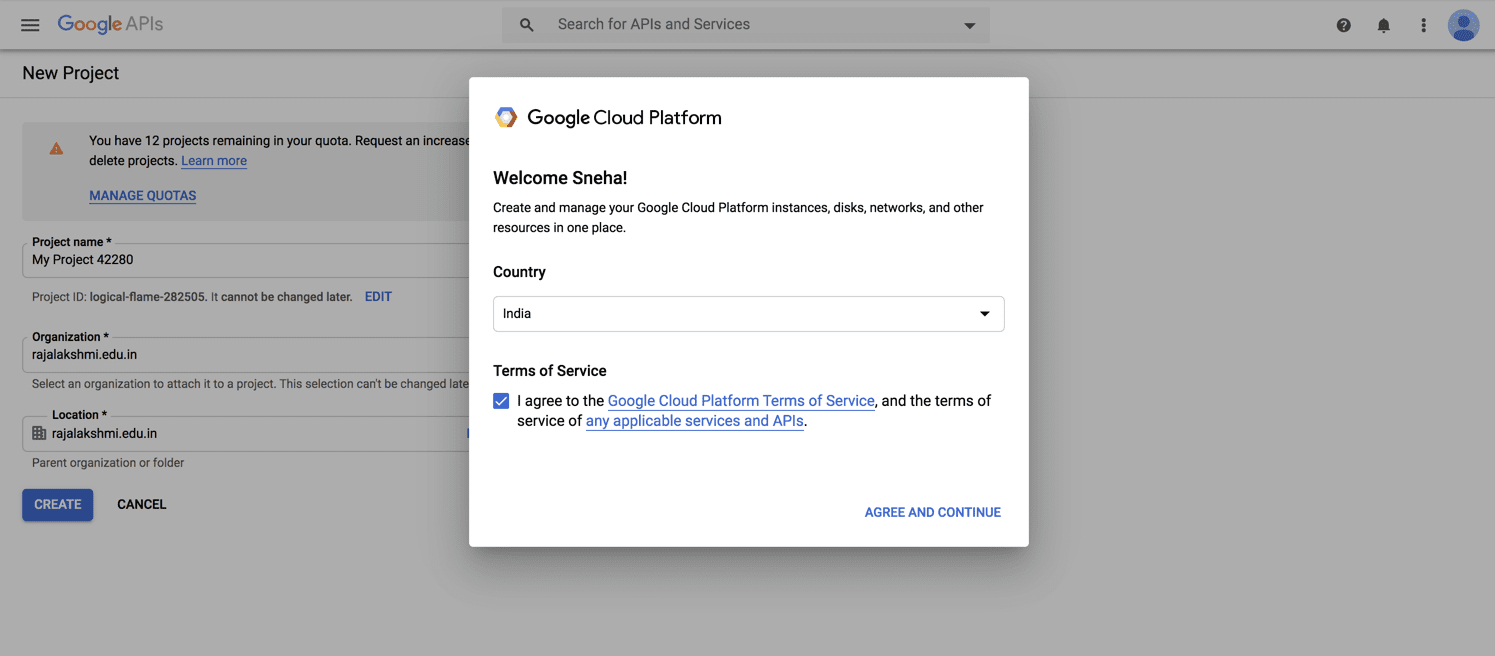
3. Give your project a name and choose the organization that will be fetched automatically from your email address, if it's a corporate email address.
4. Click Create.
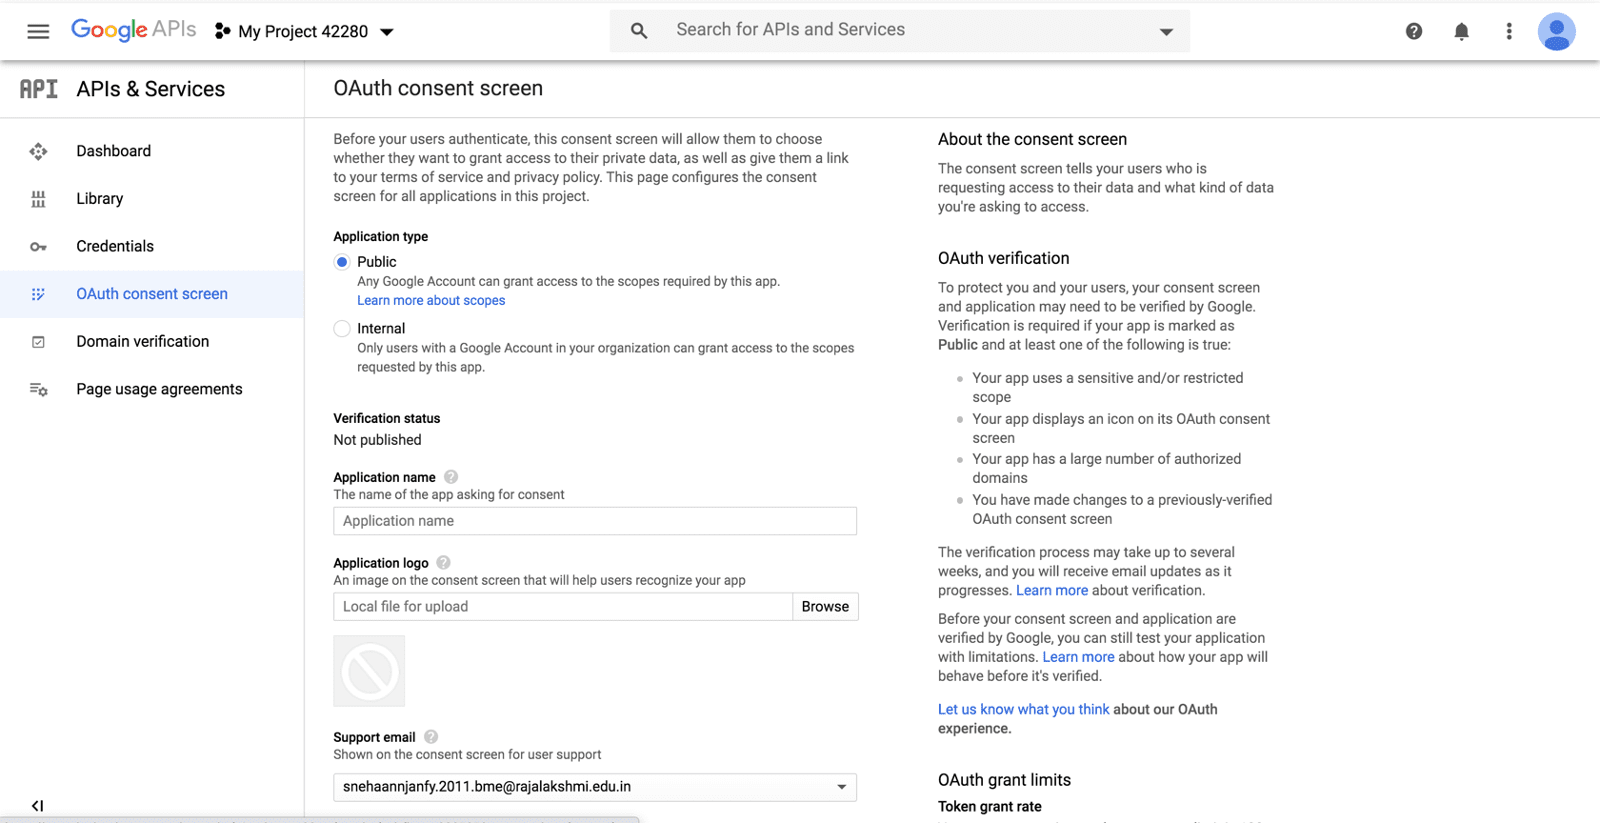
OAuth Consent Screen
5. Click the Configure consent screen button. To create OAuth ID, a product name needs to be first set in the consent screen.
6. On the Consent screen, select the audience of your app. Choose Internal if the audience will only be from within your organization. Choose External if you want the audience to be anyone with a Gmail account.
7. Provide an Application name and Application logo. Provide a Support email that will be used for user support.

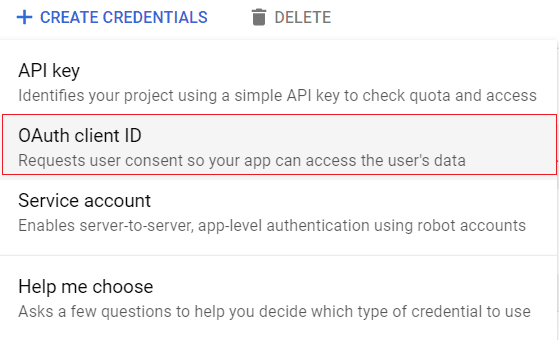
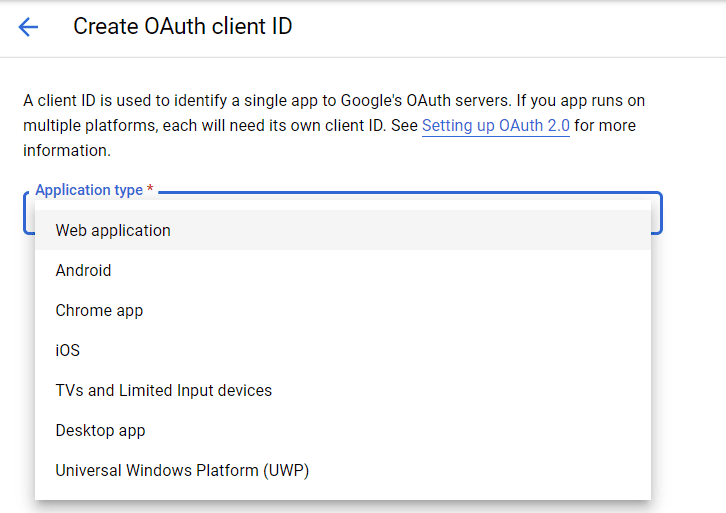
Create OAuth Client ID
3. Enter Name as Web client 1. This will be used to identify the client in the console, and won't be visible to end users.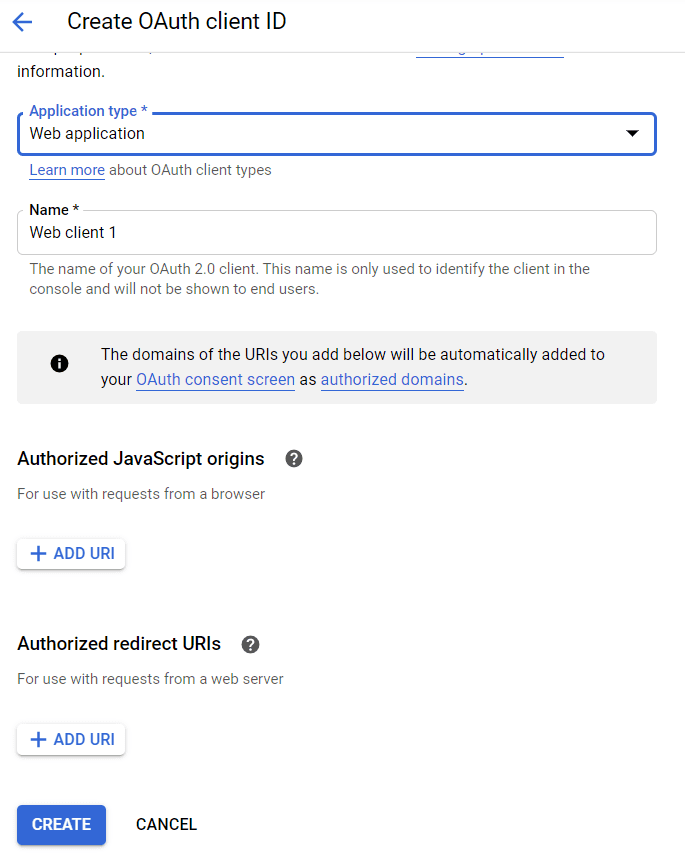
4. Enter URI. This is the same URI entered in the OAuth Consent screen as Authorized .
5. Enter Authorized redirect URI's. This should be the URI specified in your Zoho Commerce UI.
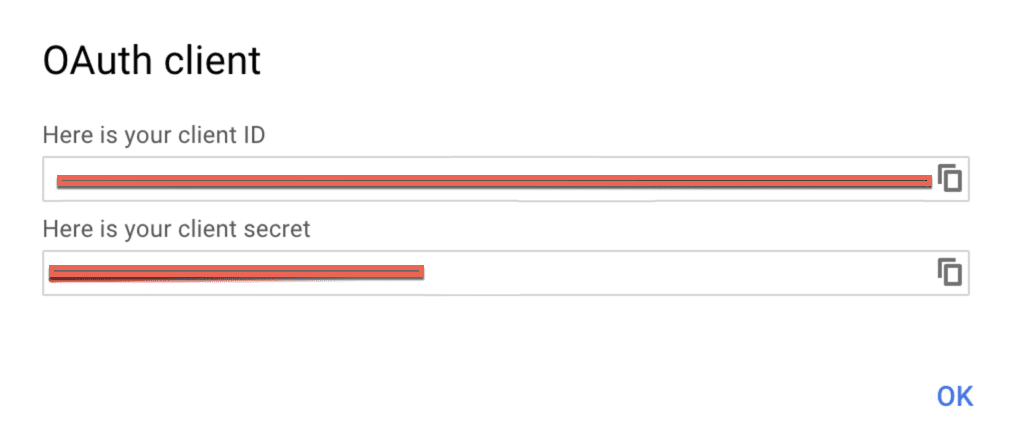
6. Click Create. A client will be created and Client ID and Client Secret will be shown as below.

Related Articles
Registering a Client with Facebook
To use Social Login to allow sign-up using Facebook, a Facebook client has to be generated first. These steps will help you set up OAuth Client within Facebook. Creating an App 1. Go to Facebook Developers Page. 2. Sign in using your Facebook ...Google Shopping
Google Shopping lets you list products from your online store for shoppers to see in the Ads section at the top of the search result pages. Your product will appear to millions of online shoppers across the world based on relevance and keyword hits. ...Google Analytics
Google Analytics helps you to audit the number of people who have visited your ecommerce site at any given point of time. This helps you set business strategies that will elevate your business. Benefits of the Integration Use the Google Analytics ...Google Webmaster Tools
Webmaster tools help the SEO efforts of your website and provide a window into how you can optimize your store for better results. Meta Tags Using Google Search Console, enter your Meta Tag ID to verify your website with Google. To access and ...Google Tag Manager
The Google Tag Manager allows you to manage tags or snippets of JavaScript that are on your website. To access and add Google Tag Manager: Log in to your Google Tag Manager account. Create an account. Enter an Account Name and select a Country. ...