Communicating with Customers
Make Calls
You can call your customers by selecting the record you wish to speak with. You can also log the call for future reference.
To make a call
- Go to the module (Leads/Accounts/Contacts etc.).
- Tap a contact to whom you want to make a call.
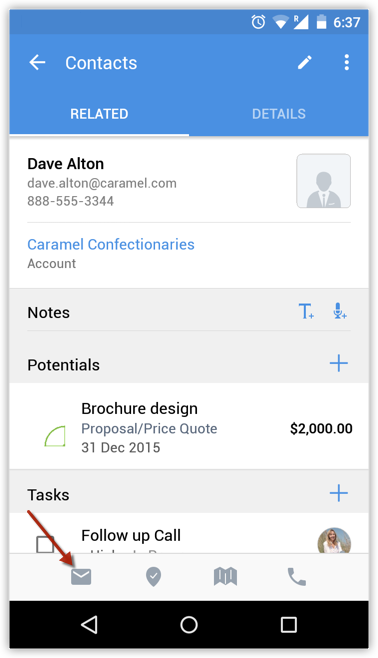
- In the Record Information page tap the
 (Call) icon.
 - Tap the Phone Number to call the contact.
- When the call is completed, you can also log the call and it will be available in the Calls module.
Log Calls
It is important to track the conversations that you made with your Leads/Contacts. That's where logging a call comes in handy. When you log a call, you are creating a history of that call that is vital for future reference.

Both incoming and outgoing calls can be logged from your Zoho CRM application.
To log a call, you need to enable the options in Zoho CRM app settings.
- Go to Zoho CRM app and tap Settings.
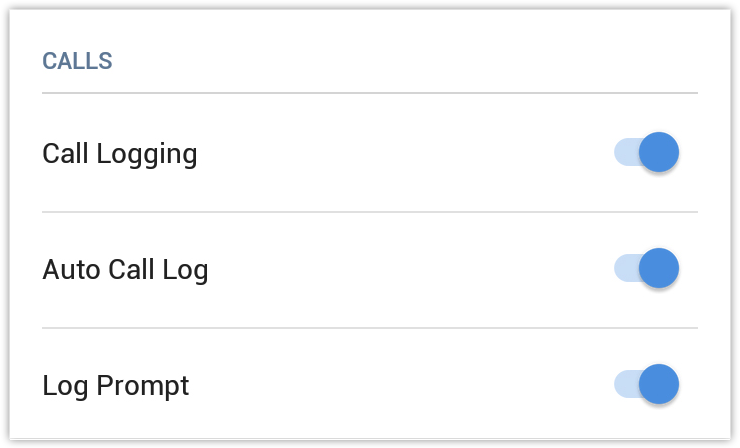
You will find a list of options under calls. - Call logging - Enabling this option, permits you to log calls.
- Auto Call Log - Enabling this option, allows you to log calls automatically.
- Log Prompt - Enabling this option, prompts you to log a call after completion.
To log an outgoing call
- Place a call.
- Once the call is completed you will be prompted to log the call.
- Tap Yes to log the call.
- In the Call Information page enter the necessary details and tap Save.
To log an incoming call
- Answer the incoming call.
When the call is over, Log this call option will be available (only if the incoming call's phone number is already present in your Zoho CRM account).
- Tap the tick icon to log the call.
- In the Call Information page enter the data that is required and tap Save.
To Schedule a call
- Go to the module (Leads, Accounts, Contacts, etc.).
You can also go to the Calls module and add the call details. It will be associated to the record that you select. - Select a record to which you want to schedule a call.
- In the record's Related section, click the Add icon against Calls.
- In the call information page tap on Type > Schedule call.
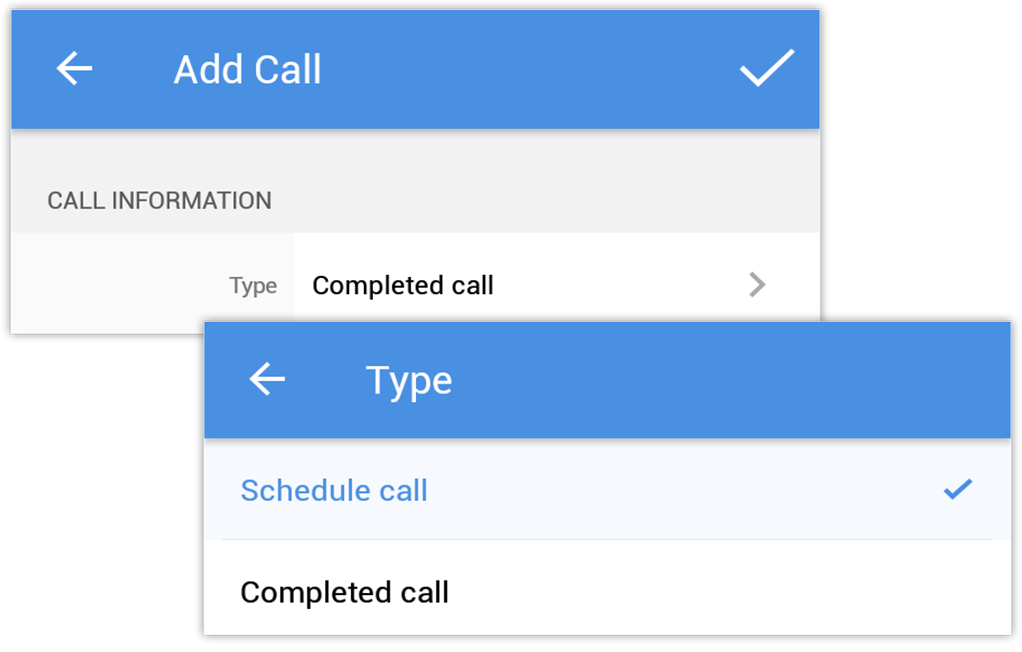
- Specify the required data and tap Save.
Send SMS
- You can send SMS to your Leads/Accounts/Contacts provided their contact number is available.
- To send SMS
- Tap the Leads/Accounts/Contacts module.
- Select the record you wish to send an SMS.
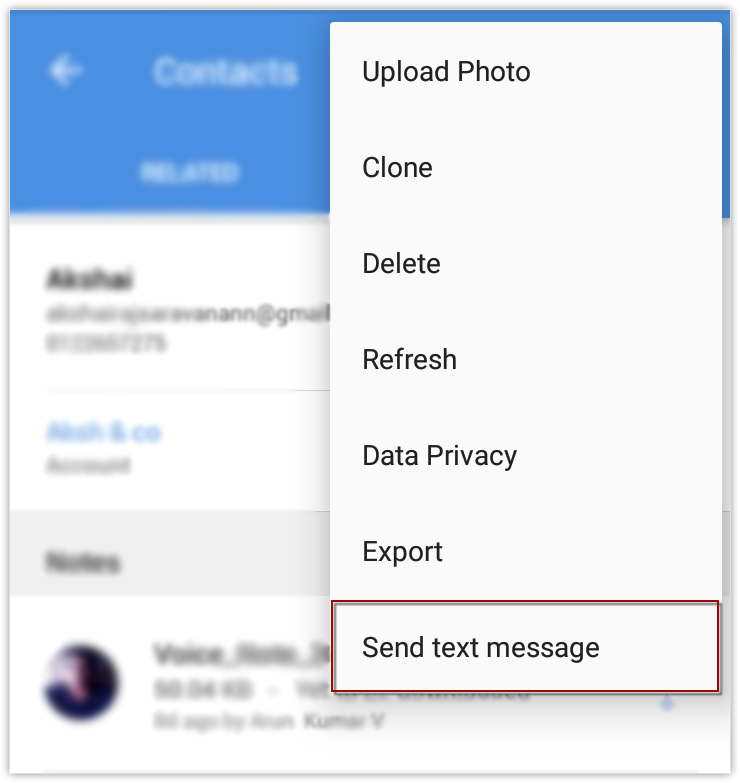
- In the Record Details page, tap the
 (More) icon.
 - Tap Send Text Message to compose and send.
Send Emails
To send an email
- Go to Leads, Contacts or Cases module (or any other custom module).
You will have the option to send an email to the contact if the email address is available. - Tap a record to which you want to send email.
- In the Record Information page, tap the Email icon.
- Select the Application that you want to use to send the email.
- Compose an email and send.

Note
The Email tab is currently not supported in the mobile CRM app.
Use MailMagnet in Android device
With Zoho Mail Add-on configured in your Zoho CRM account, you will have an inbox full of important emails from customers that are associated to your leads and contacts. It is very important that emails from your customers get a timely response and in that case, email notifications play a vital role. MailMagnet does exactly that.
For a field sales rep on the move, the MailMagnet option is very useful to receive instant notifications so that the most important emails from leads and contacts get your immediate attention. MailMagnet intelligently scans your inbox and notifies you of the emails from your prospects and customers in CRM.
MailMagnet will be available only if you enable the Zoho Mail Add-on feature and configure your email account within Zoho CRM via POP3 configuration. Read more about Zoho Mail Add-on.
Note
- When you receive mails from leads or contacts, it will be listed under MailMagnet. Outgoing emails will not be listed in MailMagnet.
- Only if you are the recipient (i.e. your emails address is in the To or CC fields of the email), will you receive the email in MailMagnet.
- Group mails, such as info@zillum.com, sales@zillum.com, etc. will not be listed in MailMagnet.
- The mail magnet will retrieve emails every 3 minutes.
- 100 emails will be listed under MailMagnet.
To reply to emails
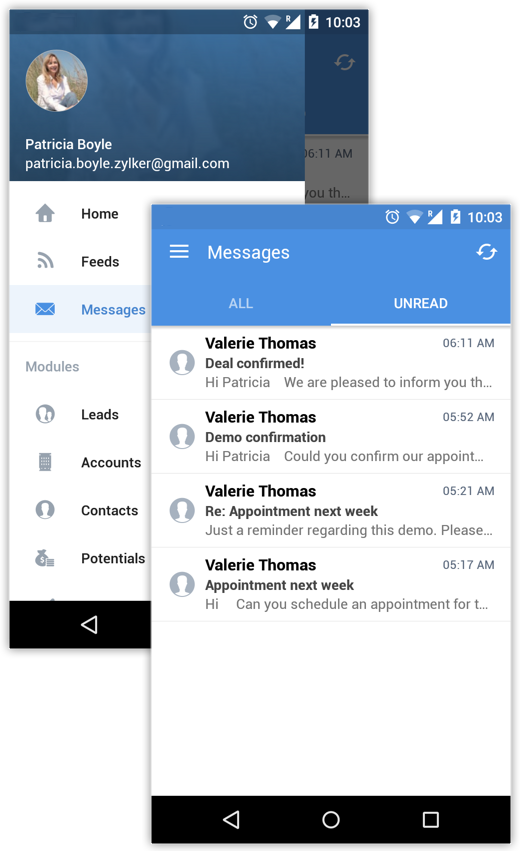
- Tap Messages option in the Zoho CRM app.
- All the emails from the leads and contacts will be listed.
- Tap an email to open.
- Tap on the Reply icon and compose an email.
You can also use the Reply All icon, if required.
- Tap Send.
On sending the email, you will get the option add a follow-up task and a note.
To add a follow-up task/note
- Tap Messages option in the Zoho CRM app.
All the emails from the leads and contacts will be listed. - Tap an email to open.
- Tap the More icon.
- Select Task or Note as required.

- In the Add Task screen, specify the Task details and tap Save.
- If you have selected Note, type the note and save it.
Related Articles
Communicating with customers through iPhone
Make and log calls You can call the records (e.g. Leads, Contacts) and also log the outgoing call details in CRM. In order to log the call information, you will have to enable Call Logging in Zoho CRM App settings. To enable call logging Go ...How can GDPR be enabled for existing customers?
You can enable GDPR for existing customers by clicking Setup > Users and Control > Compliance Settings, turning compliance settings on, and selecting those modules for which compliance will be applicable.Best Time to Contact Customers
We often hear telecallers asking, "Is this the right time to talk?". Though most of the times our response is not affirmative, have you wondered why is it important for them to know whether it is the right time to contact? Because, ...My visits seem to be duplicated, as the same user appears in both Customers and Leads/Contacts streams. Why is that?
When some leads visit your website, they appear in the Leads/Contacts stream. If they buy from you, they become your customers. After becoming customers, when the same users visit your site again, they appear on the Customers stream. So the visits ...My visits seem to be duplicated, and the same user appears in both the Customers and Leads/Contacts streams. Why is that?
When leads visit your website, they appear in the Leads/Contacts stream. Once they buy from you, they become your customers. After they become your customers, if the same users visit your site again, they appear in the Customers stream. So these ...