Associating Actions for Approval or Rejection
With each approval process, you can associate some actions such as adding a task, updating fields, sending email alerts, calling webhooks, etc. that will be executed on approval or rejection of a record. When you set multiple stages of approval that involves more than one user to approve the record, you can assign a task and also update a field after each approval. Whereas, email alerts, webhooks, and custom functions can be added only to be triggered after the final approval.
Actions on rejection do not include all the 5 of them. You cannot associate a task on rejection. The Assign Task option is to set a task for the next user who needs to approve the record. The task ideally is to check the records waiting for their approval. In case of a record being rejected, assigning a task is not required.
Assign Tasks
- While creating an approval process, under Actions on Approval, click on the Assign Tasks section.
Already created tasks, if any, will be listed. You can select one to associate it and skip to step 4. - Click New Task.
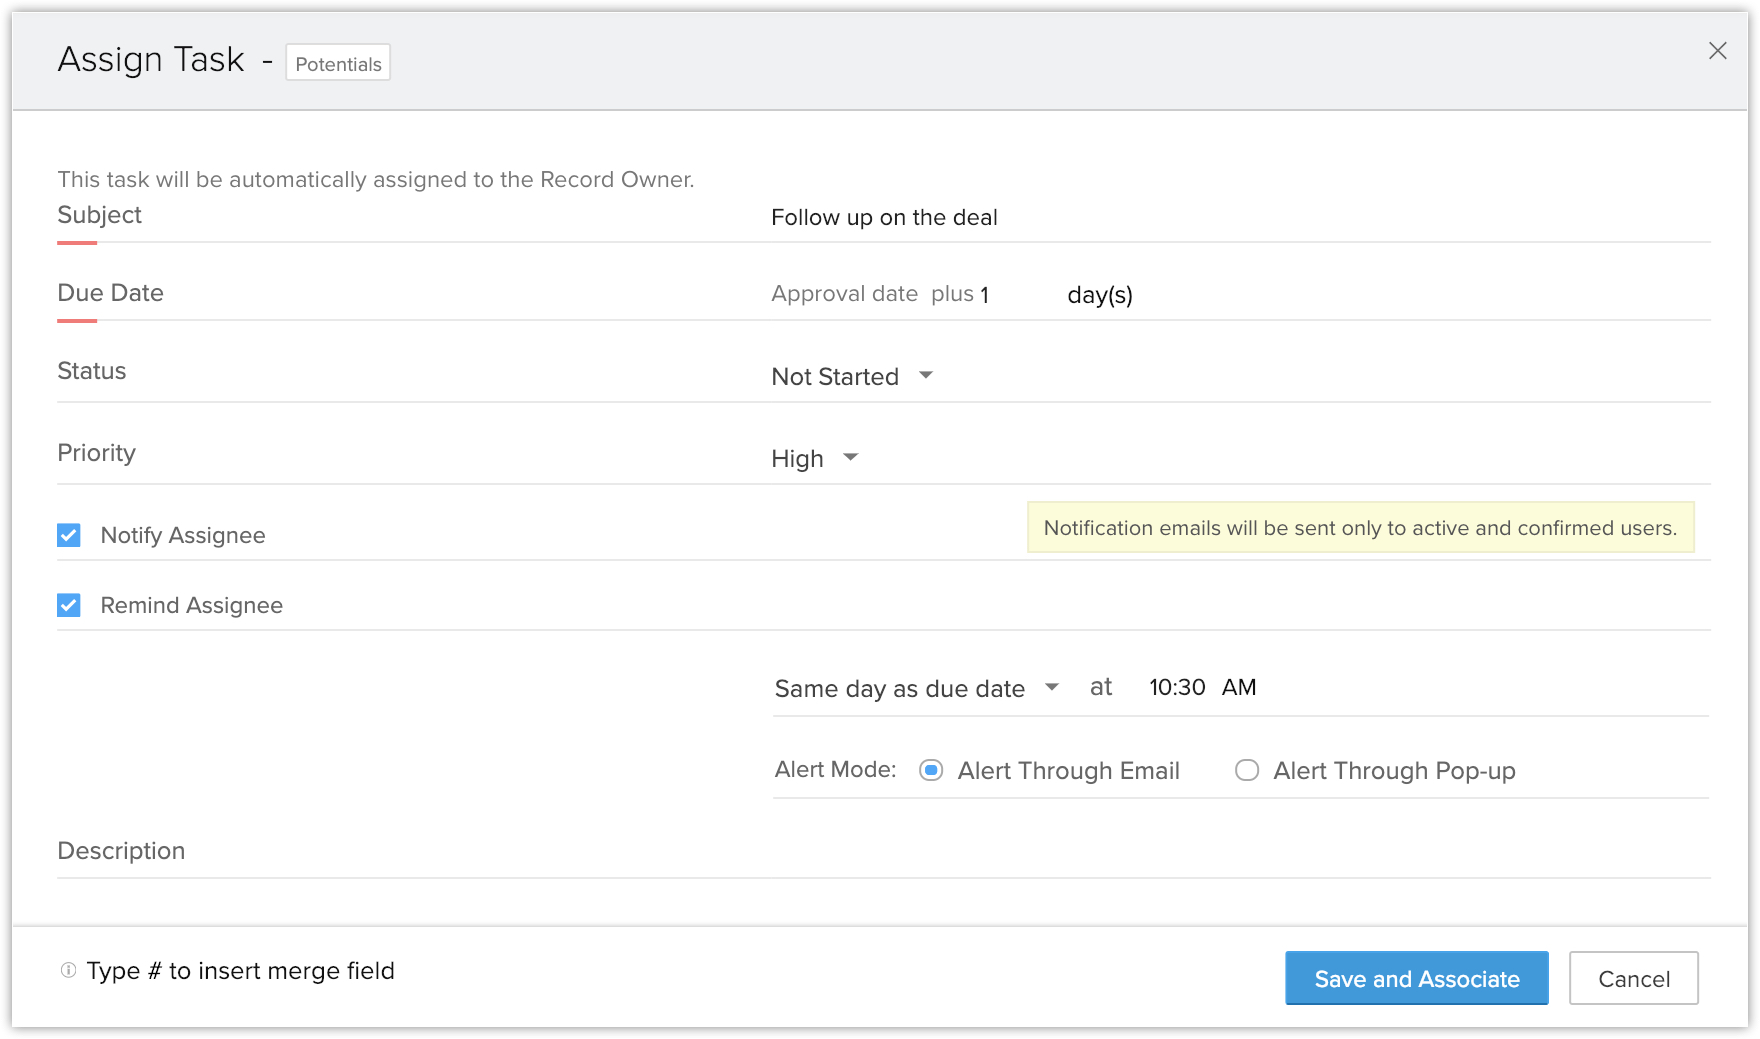
You can also select one from the already existing tasks and associate it. - In the Assign Task popup, do the following:
- Enter a Subject for the task.
- Select the number of days from the drop-down list to set the Due Date for task.
- Select the Status and Priority of the task from the respective drop-down lists.
- Select the Notify Assignee checkbox, if required.
A notification email, informing the user about the task, will be sent only to active and confirmed user. - Specify a Description for the task.
- Click Save and Associate.
Update Fields
- While creating an approval process, under Actions on Approval/Reject, click on the Update Fields section.
- In the Update Fields popup, do the following:
- Choose a field to update from the drop-down list.
- Specify the Value that you want to update on each level on approval.
- Click Done.
Send Alerts
- While creating an approval process, under Actions on Approval/Reject, click the Send Alerts section.
Already created alerts, if any, will be listed. You can select one to associate it and skip to step 4. - Click NewAlert.
- In the Send Alert popup, do the following:
- Enter a Name for the alert.
- Select the Email Recipients for the alert email from the drop-down list.
You can select persons associated to the record, users, roles, roles and subordinates and groups. - Specify AdditionalRecipients for the email alert in the text box.
Use comma to separate more than one email address. - Select the Email Template that you want to use for the alert or create a template.After selecting the template, you have to enter the From and Reply to email addresses. Here you can choose from:
- Your email address
- Your organization email address
- Current user email address
- Record owner's email address
- Other user's email address
- For Reject: The Email Template will be automatically sent as a notification from the email address notifications@zohocrm.com.
- Click Save & Associate.
These alerts will also be listed under Setup > Actions > Workflow > Alerts.
Call Webhooks
- While creating an approval process, under Actions on Approval/Reject, click on the Call Webhooks section.
Already created webhooks, if any, will be listed. You can select one to associate it and skip to step 4. - Click New Webhook.
- In the Call Webhook popup, do the following: See Also Creating Webhooks
- Enter a Name and Description for the webhook.
- In the URL to Notify text box, specify the REST API URL of the third-party application.
- Select POST or GET as the type of API Method.
- Under URL Parameters - Append Entry Parameters, do the following:
- For Parameters in Standard Format, specify the Parameter Name and the corresponding Parameter Value.
This is the request parameter sent while triggering the webhook notification to third-party application. - For Parameters in User Defined Format, specify the Parameter Name and the corresponding Value Description.
- For Parameters in Standard Format, specify the Parameter Name and the corresponding Parameter Value.
- Under URL Parameters - Append Custom Parameters, do the following:
- Specify the Parameter Name and the corresponding Parameter Value.
- Check the Preview URL.
- Click Save & Associate.
These webhooks will also be listed under Setup > Actions > Workflow > Webhooks.
Call Custom Function
- While creating an approval process, under Actions on Approval/Reject, click on the Call Custom Functions section.
Already created custom functions, if any, will be listed. You can also select one from the already existing custom functions and associate it. - To create custom functions and associate to the approval process, refer to Creating Custom Functions
These custom functions will also be listed under Setup > Actions > Workflow > Custom Functions.

- Once a record has been submitted for approval, a system generated notification email will be sent to the user who has to approve the record(s).
- On the approval of the record, the record owner (the user who submitted the record for approval) will receive an email as per the email alert configuration in the approval process. In the absence of an email alert for the record owner, a system generated email regarding the record approval will be sent to the record owner.
- In case of multiple stages of approval, you can assign a task and also update a field after each approval.
- You can associate one email alert, webhook, and custom function each. It will be triggered only after the final approval, if there are multiple approval stages.
- While adding alerts, webhooks or custom functions, those created for Workflow Rules will also be listed and vice versa. You can associate them to the approval process.
Related Articles
Approval process
Define Approval Process for records Help guide Approval Process: an Overview Adding an Approval Process Associating Actions for Approval or RejectionView Approval History
Approval History gives you a list of records that were submitted for approval. To view the Approval History In your Zoho CRM account, click the My Jobs tab. Click the Approval Process tab. In the Awaiting your Approval page, click Approval History. ...Adding an Approval Process
Each approval process is associated to a rule that defines the process. You need to specify the rule criteria, the approval authority and also actions that need to be carried out on approval or rejection. Create approval processes for purchase ...FAQs on Approval process
1. What is an approval process? Approval processes allow organizations to automate the approval of various business activities. For example, an organization may need a senior member to approve sales orders, budgets, capital expenses, discounts, ...Approving or Rejecting from the Approval Tab
Records that are lined for approval can be viewed in the Approval tab. From this tab, you can approve or reject the records that are waiting for your approval. If needed, you can also delegate the record's approval to another user. Only after the ...