Setting up Portals and Inviting Users
Let us consider a few scenarios to understand how portals can be helpful in your business.
- In a franchise - Imagine you run a fast food business and have granted others the right to operate the franchise in a few locations. You use Zoho CRM to manage all the business details and to track outlets' performance. The franchise owners can request to view their outlets' performance and their customers' details. You can create exclusive portals for the franchise owners. They will be able to view and edit the relevant records right from the CRM.
- In the automobile industry - For example, you have an automobile shop and want to track your customers' details, your sold vehicles and servicing schedules. To do this, you can create a portal and share it with your clients. The customers can view and edit their details in the portal, and they will be updated in your CRM records. Similarly, if they want to get their vehicle serviced, they can fill in their details using the portal.
- In an educational institute - If you run a school, instead of manually entering every student's details, you can provide parents with access to the portal's. They can add, update, or view their child's details in the portal and share the students' grades and performance scores with the parents through the portal.
- For business partners - You run a software company and use CRM to follow up with your contacts and leads or to track multiple deals that are at different stages. There is a meeting with the partners and you want to discuss all the contacts and the deals that have the highest revenue. Imagine how tedious it would be to share this complex information with individual partners. You can easily manage this situation by creating a portal for the partners, where you give them access to the Contacts module and add a contact lookup in the Deals module in CRM. This will enable them to view the contacts and their associated deals and add or remove details in the modules based on their permissions.
Permission Required
Users with the Manage Portal Profile permission can create a portal and invite customers.
Pricing of Portals
- You can configure up to five portals. The first portal is free and can be created only for the Contacts module.
- The additional four portals need to be purchased. These portals can be created for the Leads, Contacts, Vendors, and Custom modules.
- First portal - The first portal user type is added by default. You can invite up to 10,000 users to this portal for free. Please contact support@zohocrm.com if you need to add more users.
- Four additional portals - For adding more portal user types, you need to purchase portal user licenses. The pricing model for additional purchases:
- 1 user (minimum user count) - $10/user/month
- 1 to 1,000 users - $10/user/month
- 1001 to 10,000 users - $8/user/month
- 10,001 and above users - $5/user/month
Actions that a portal user can perform
Portal for trial edition
The Enterprise and Ultimate trial edition users can configure and use portal for the 30-day trial period. Once configured, the system-defined default portal for the Contacts module will be created to which they can add a maximum of 10 users. - If you subscribe to Standard or Professional paid editions then the portal created in the trial edition will be retained.
- If you subscribe to Free edition then the portal details will be deleted after 30 days.
Setting up portal

- Go to Setup > Channels > Portals .
- In the Portals page, click Get Started Now.
Your company's name will appear as the default portal name. - Edit the Portal name, if required.
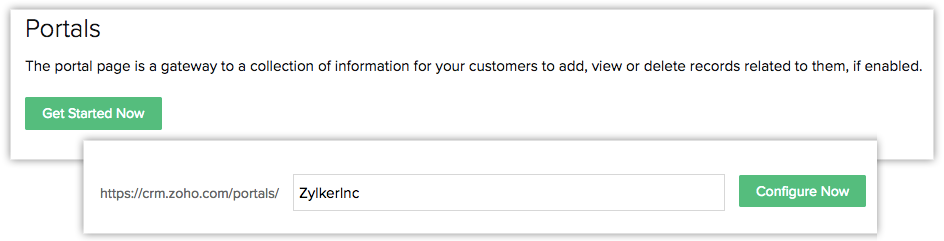
- Click Configure Now.
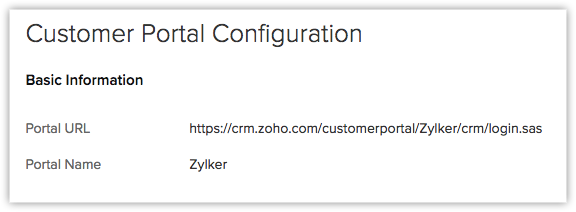
The customer portal URL will be generated and the portal name will be available. - Click Next to continue.
Next, define the portal user type, portal tab configuration, and field permissions.
- You will not be able to edit the portal name once it is created.
- Once a portal is configured you will not be able to delete it.

- When you create a portal, a default portal called Client Portal will be created that cannot be deleted. You can add up to 10,000 users without payment. To add more users you need to purchase. You can only add clients or customers to this portal, you will not be able to add users from the same domain, i.e., your employees or partners.

Editing a portal URL
Defining Portal user type

To define a portal user type
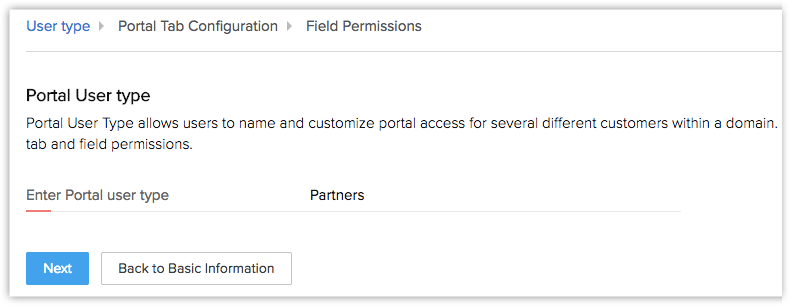
- Under Portal User Type enter a name e.g., parents, partners or service agents etc.
- Click Next.
Configuring the portal tab
- Choose the module: You can choose to give the customers access to the Leads, Contacts, Vendors or custom modules. The customers will be able to view their own details in the module and based on their permissions, they may be able to add and edit records.
- Select the related modules: The modules that have a lead or contact lookup are listed under the related modules. You can choose the list of related modules that you want the customers to be able to access. Here, only the records that are associated with the module (Leads, Contacts, Vendors, or custom modules) through the lookup field can be viewed.
- Select the layouts of the related modules: You can choose more than one layout for each related module for the portal users to access.
- Define the module record permission: You can set the permission level for each record in a module. For example, you can allow the clients to view or edit their license number or mailing address, or give a vendor read-only permission to purchase orders.
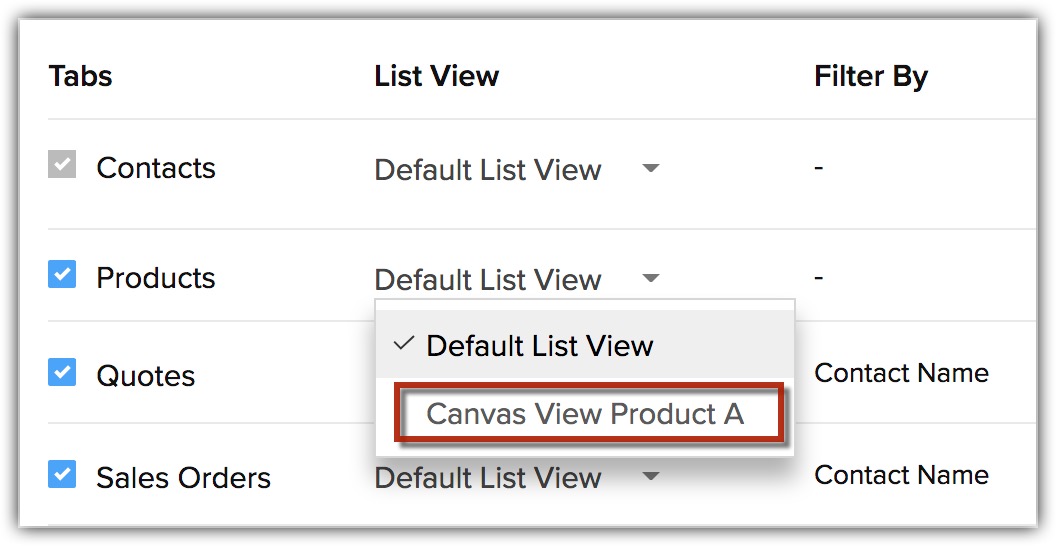
- Select list view: If you have created a canvas view for any CRM module, you can choose either List view or Canvas view to display a record. List view will be selected by default for all modules.
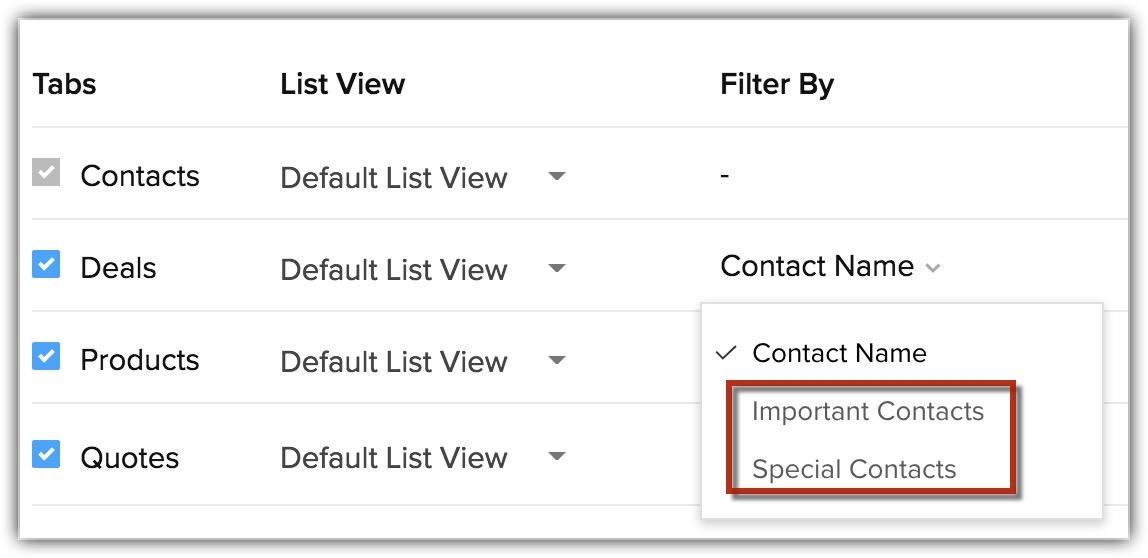
Note that the custom buttons or custom links will not be displayed for the portal users if they are added to the Canvas or List view. - Filter By: Select the records that the portal user will view by using the lookup filter. For example, if you have added two lookup fields in the Deals module, you can choose a lookup based on the records that you want the portal user to view. However, the lookup filter will only be available to the existing portal users if they edit the portal configurations.
- Select Public Modules: Any module that you have marked as Public read only or Public read/write/delete (through data sharing settings) will be accessible to the portal users. These modules will be listed under the Public Modules category in Portal and the users (portal) will only have View permission for all the records that are present in the module. When a module is selected from the public modules category it will be removed from the related modules list.
Note: The Products module must be shared with the portal users to allow them to associate products with the records present in the Inventory modules. - Select Web Tabs: As an organization, you may have a few customers who access your crm with the help of portals. In addition to viewing the modules and its related records, they can get access to the web tabs as well. Consider an apparel store that has a webpage www.zylkerapparels.com/announcements, to post important business updates such as sponsorships, tie-ups, new acquisitions, etc. for internal users and stakeholders. They can share this web tab with the stakeholders via portal to provide quick access and easy navigation from within CRM. All the web tabs that you create in Zoho CRM will appear under portal configuration.
To configure the portal tab
- In the Portal Tab Configuration page, select a module from the Choose Module from the drop-down list.
- In the Related Modules section, do the following:
- Tabs - Select the checkboxes for the related modules that the portal users will be able to access.
- Layouts - Select one or more layouts that the users will have access to.
- Permissions - Choose create, edit, view, delete or edit (shared) module permissions. Portal users will only be able to perform actions on the records based on their permission. The edit (shared) permission will allow the portal users to edit those records that have been added by CRM users to the module.
- List View - Select either List view or Canvas view for the records.
- Filter By - Select the filters from the drop-down list.
- Select the modules from the Public Modules section.
- Select the web tabs from the Web Tabs section. The selected ones will be displayed to the portal users. By default, only View permission is available for all the web tabs.
- Tabs - Select the checkboxes for the related modules that the portal users will be able to access.
- Click Next.
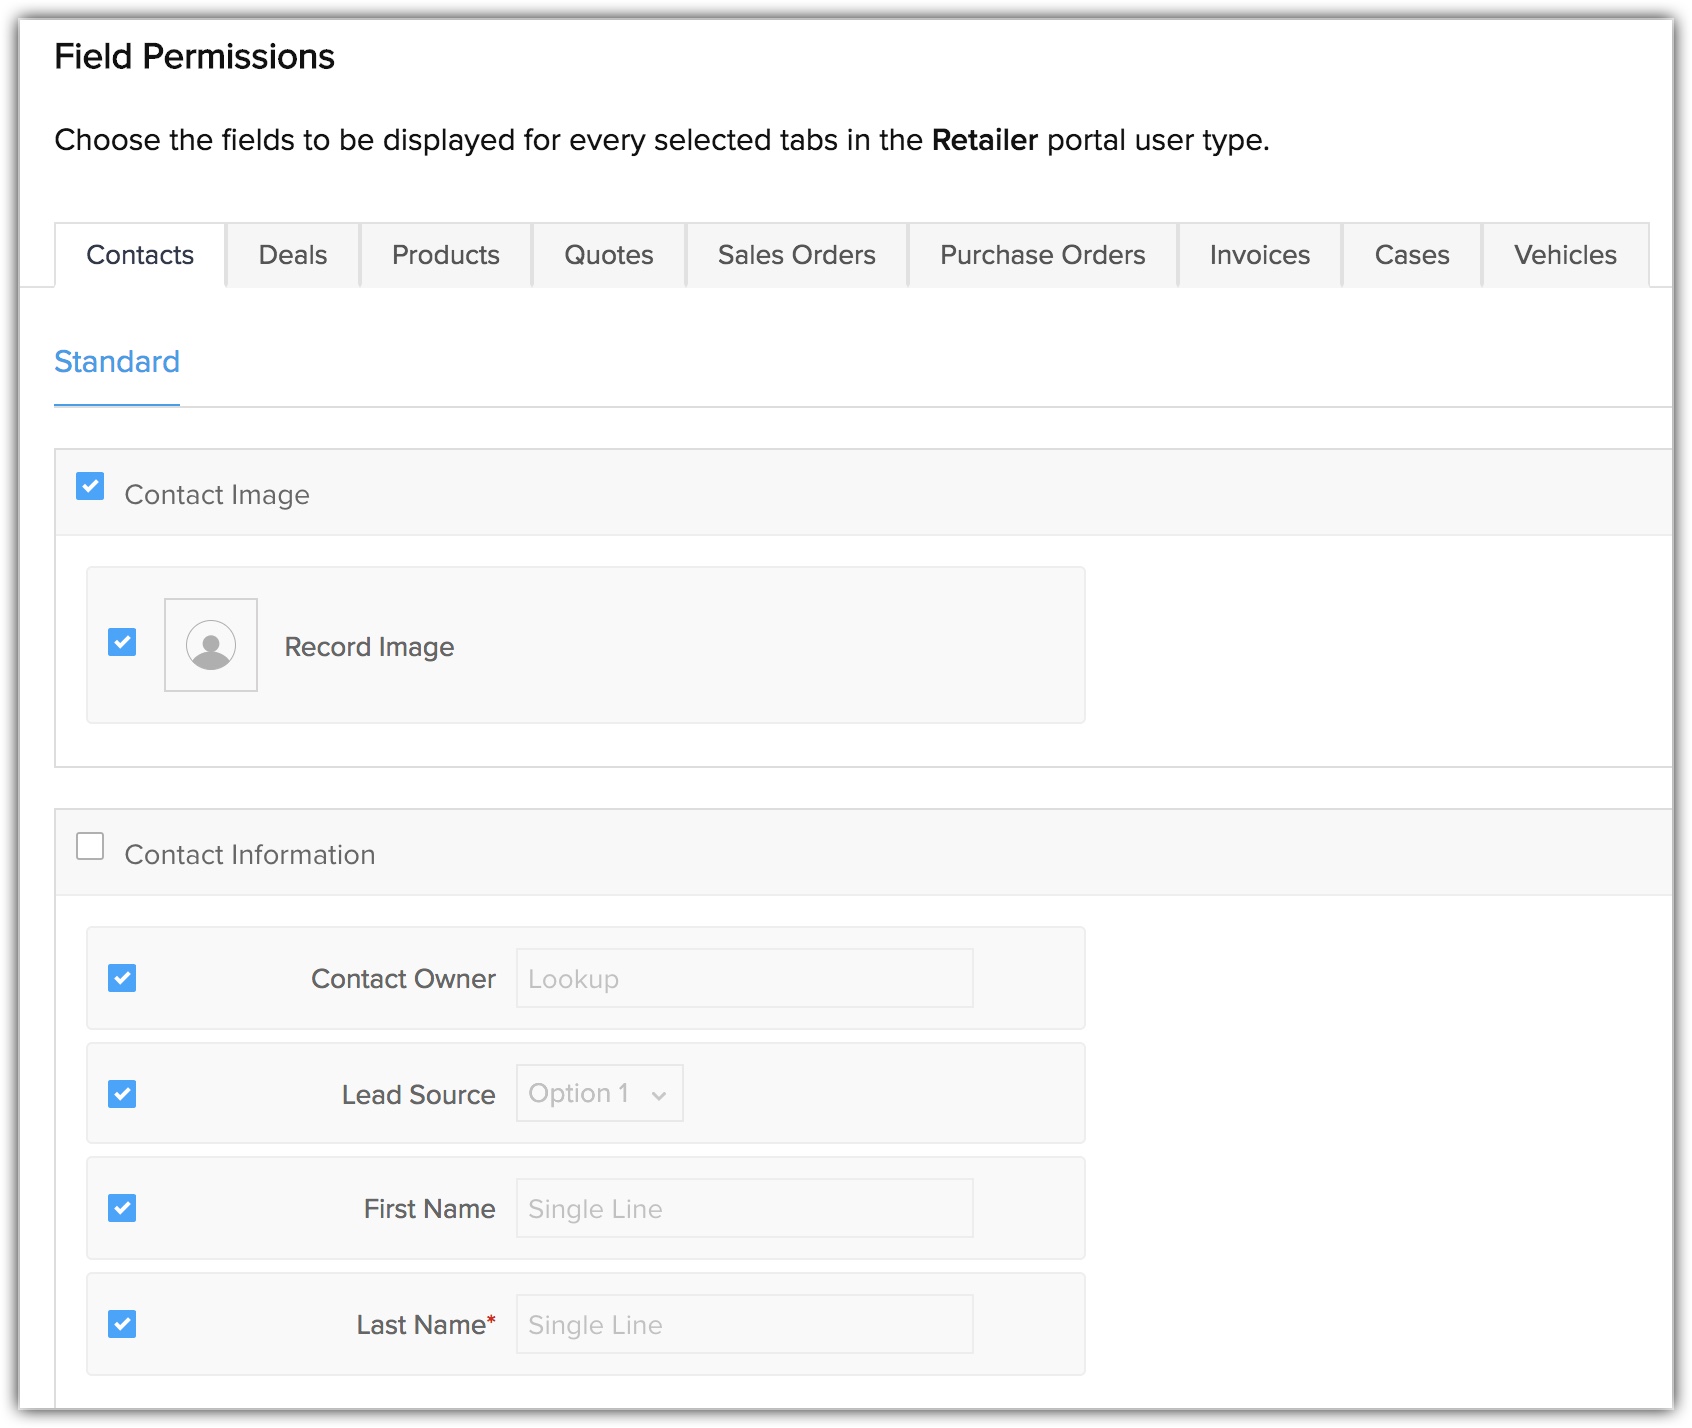
Specifying field permission
Note: The portal users can view the price of a product only if they have view permission for the "Unit price" field in the Products module. To specify field permissions
- In the Field Permissions page, select the check boxes for the fields that need to be available for the portal users.
- Click the Read Only checkbox, if required.
- Click Save and Next to move to the next layout or module to define field permissions.
- Repeat the above steps for all the modules and layouts.
You can select a subform too. - Click Finish to save all the details.
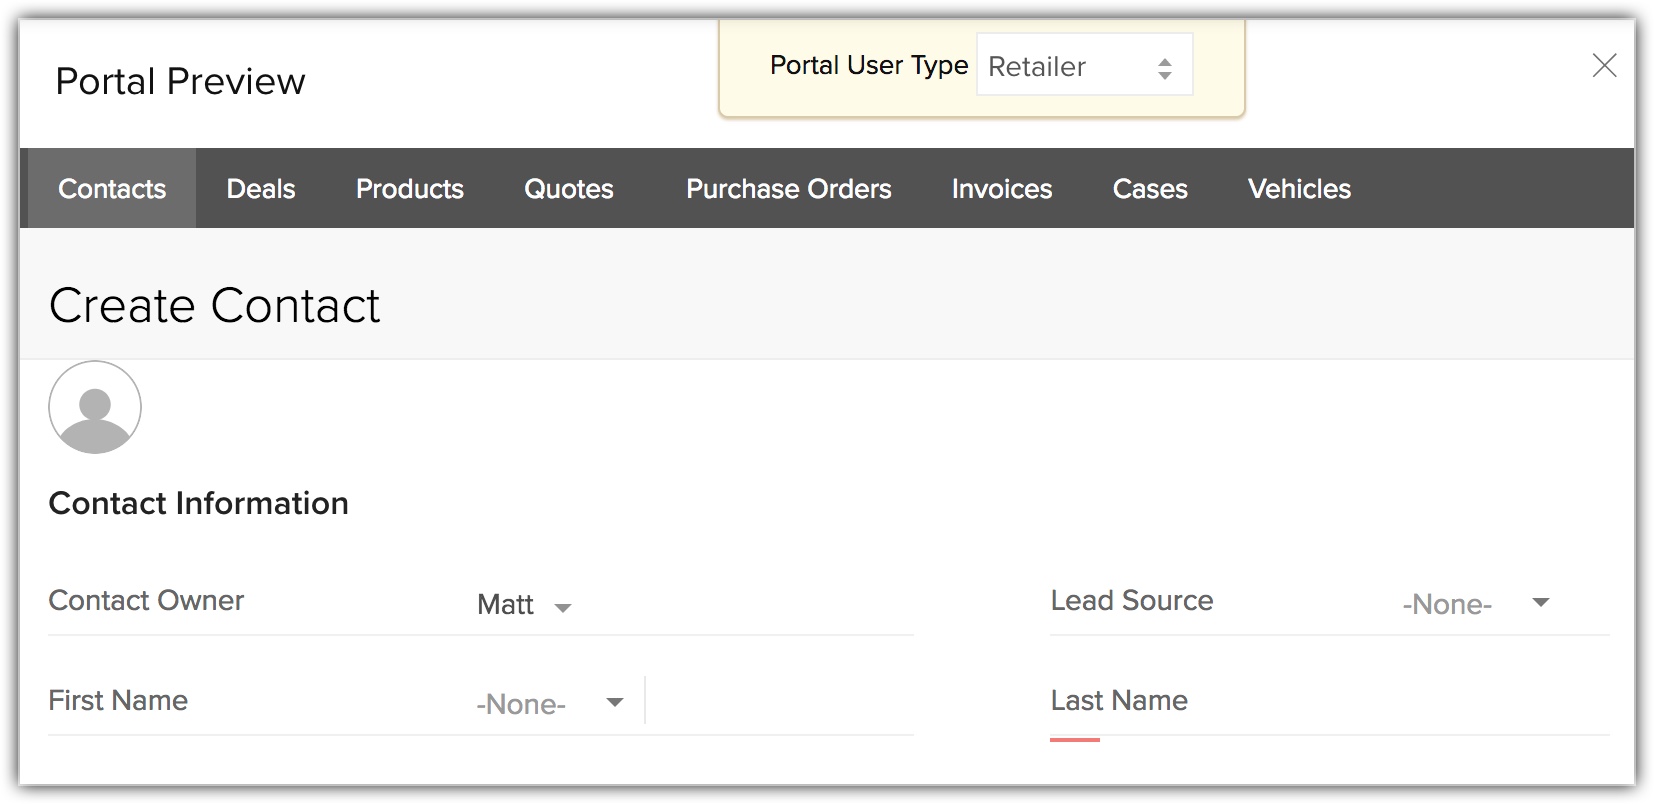
View portal preview
Once the portal configuration is complete, you can preview the portal to see how the customers will see the records.
To view the portal preview
- Go to Setup > Channels > Portals.
- In the Customer Portal Configuration page, click Preview.
- Select the Portal User Type from the drop-down list to view the preview.
You can view the portal summary after the portal configuration is completed. You can edit the Field Permission and Portal Tab Configuration in the portal configuration details. You can also add a new portal user type, if required.
Purchasing portal users
- Go to Setup > Channels > Portals.
- Click Create User Type.
- Enter the number of Portal Users in the Add Portal Users popup.
- Click Make Payment.
- Click your Profile icon and select Manage Subscription.
- Click Upgrade User / Add-Ons in the Subscription page.
- Select the number of portal users and click Proceed.
- Click Make Payment.
Working with portals
Invite users individually to a portal
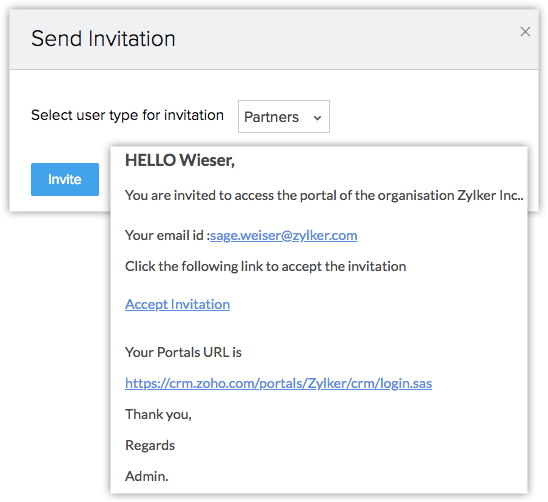
To send an invitation
- Go to a module (Leads, Contacts, Custom module) and select a record.
- In the record detail page, click the More icon and click Send Portal Invitation.
Invite users in bulk to the portal
- Go to Setup > Channels > Portal.
- Click on a portal and go to the User tab.
- Click Invite users.
- Select users from the list of users displayed and click Send Invitation.
- In Are you sure you want to send portal invitation to the selected records, click Send invitation.
- You can send an email invitation to the customers from the Record detail page. The send invite option will be available only if the email address is present.
- The invitation email will be valid for 7 days only.
- A portal user cannot be assigned as the record owner even if they create a record.
For example: Russell Brown is a CRM user who invites Sage Weiser to access portal with the permission to create contacts and deals. When Sage creates a contact through the portal, it will be added to the CRM database and Russell Brown will be the owner of the new contact.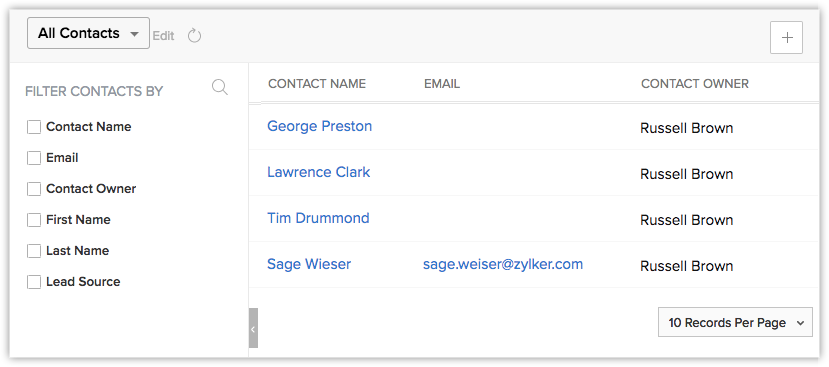
View reason for portal invitation failure
- Domain matches with the super admin's domain - The portal user belongs to the company domain. You cannot send an invitation to your employees or anyone who uses your company domain.
- Record is waiting for approval - If the record is awaiting approval from any approval process, then the invitation will not be sent as the record will be locked during this period.
- Record is waiting for review - If the record is part of the review process then a portal invitation will not be sent to the record.
- Record has not got the consent - If a user has enabled consent as part of the GDPR process, then portal invitation will not be sent.
- Email address has unsupported characters - Uppercase and lowercase letters in English (A-Z, a-z) , Digits from 0 to 9 and special characters such as @ . - _ + are supported in the email address. If the email address is not in the above format portal invitation will fail.
- Email address is anonymous - If the particular email domain is spammed, then you cannot send an invitation.
- Reached the maximum limit of user licenses for the portal - If the org has reached the maximum number of users that can be invited for a portal.
- Portal user already exists - If the user is already part of a portal user type, then you cannot send another invitation.
- No record exist - If a record is already deleted from CRM and due to any reason if an invitation is sent to the record it will be declined.
- You don't have the permission for the module - If theCRM user doesn't have the permission for a module he is sending then the invitation will be declined.
- You don't have the permission for the record - If the CRM admin doesn't have the permission for a particular module, then they will be restricted from sending invitations from that module.
- Record is in recycle bin - If the record of the user to whom the invitation is sent is moved to the recycle bin due to any reason then the portal invitation will not be sent.
View list of Portal users in CRM
Remove portal users
- Go to the User tab in the portals.
- Filter users using their status or search by their name.
- Select and click Remove users.
In the confirmation popup, click Remove users.
View information added by the portal users in CRM
Perform bulk actions from the Users tab
- Active users: Deactivate or remove them from the portal.
- Confirmed users: Change portal user type (transfer to another portal) or remove.
- Unconfirmed users: Reinvite, change user type or remove.
- Deactivated users: Activate, change portal user type or remove.
Delete a portal user type
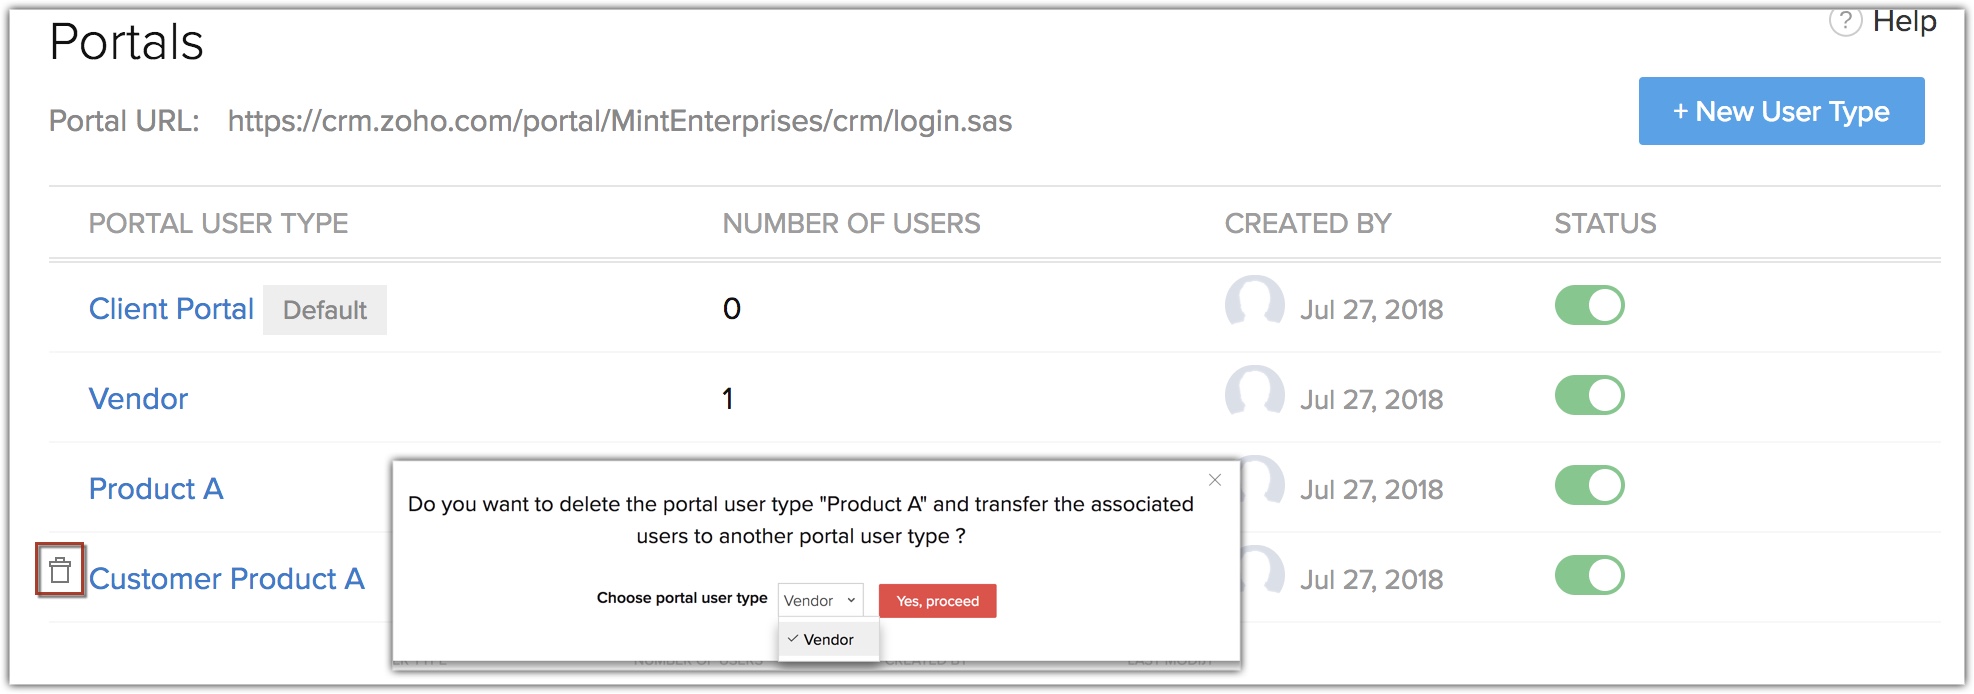
There may be instances when you want to remove a particular portal user type. In that case, you will first have to transfer the users to another portal user type and then delete the portal user type. You can only transfer the users to another portal user type if you want to delete their original portal user type.
If you have not associated any user to a portal user type, you can delete it as it is.
To delete and transfer a portal user type
- Go to Setup > Channels > Portals.
- Select a portal and hover over it and then click Delete.
- In the pop-up, click Transfer and Delete.
- Choose a Portal User Type to transfer the user to from the drop-down list.
- Click Yes Proceed.
- If you want to rename a portal user type, click the Edit option in the Portal Configuration page.
- You can deactivate user(s) who are added to a portal, if you don't want them to be a part of it anymore. You can add another user instead, as deactivated user won't count towards your user license.
Deactivate a portal user type
You can deactivate a portal user whenever you need to.
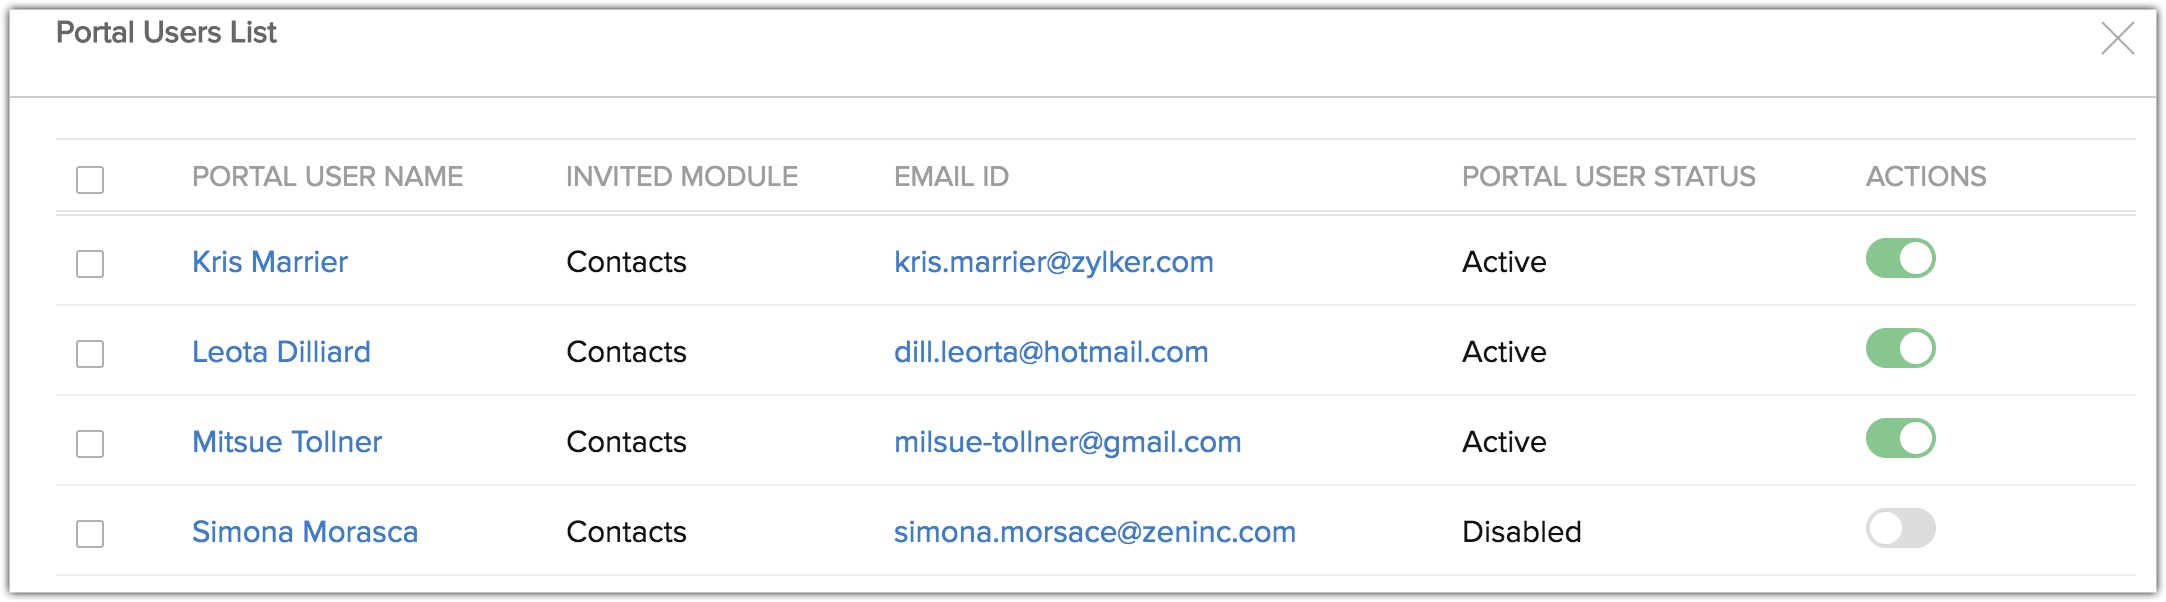
To deactivate a portal user
- Select a Portal User Type and click Portal Users.
- In the Portal User List popup, toggle off the status bar of the user.
Managing Data Privacy of Portal Users
Data processing basis
You must consider the below points when setting data privacy for the portal users:
- The data privacy tab will be displayed for a record only if the compliance settings are turned on.
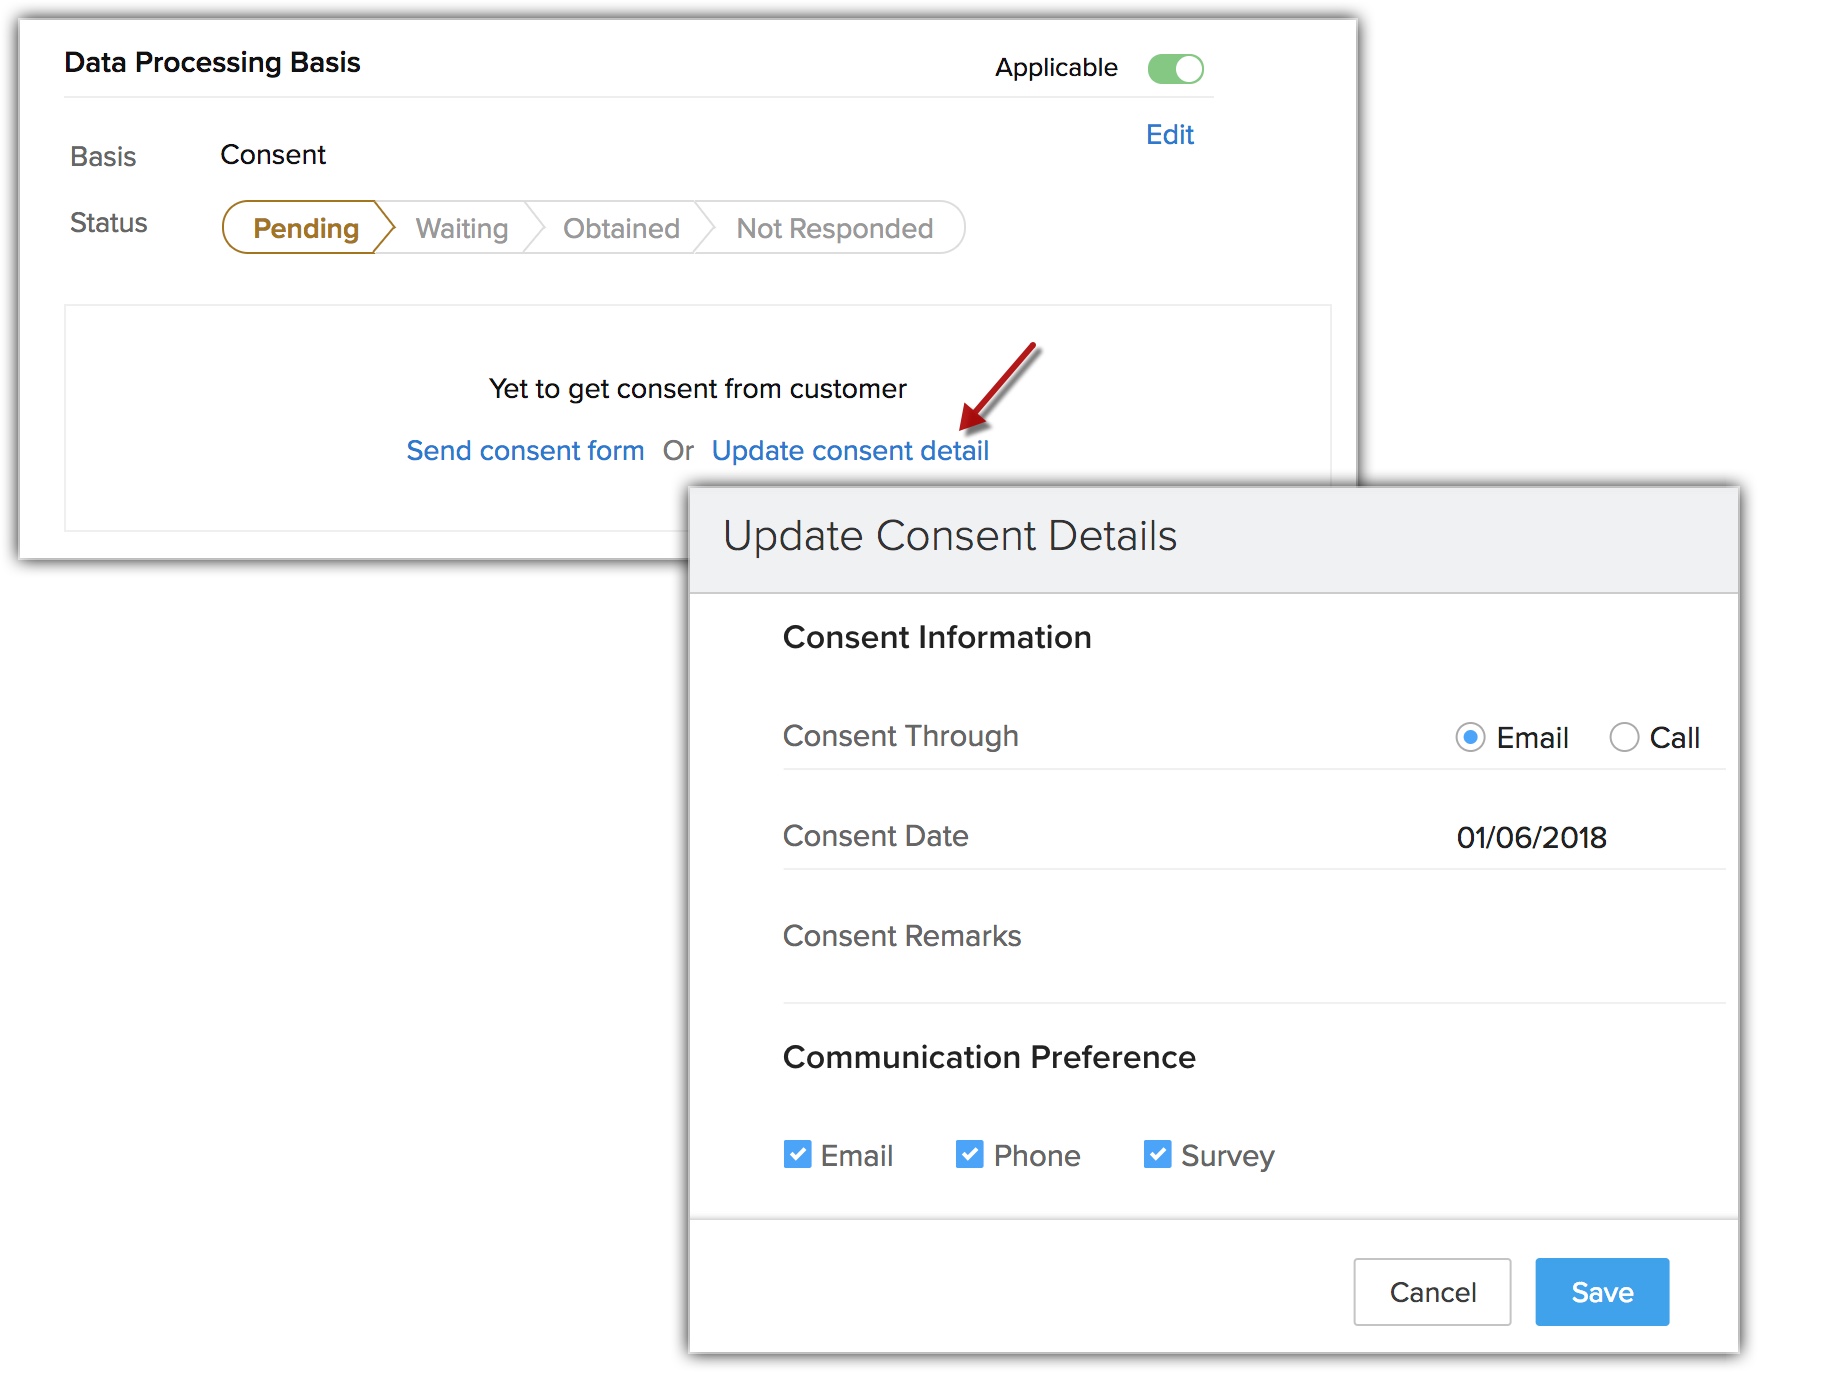
- The portal user can view the data processing basis in their account only if the data processing basis is Consent.
- The portal user can also update the consent details of the leads or contacts that they have added.
- The portal user can update their consent details from within the portal.
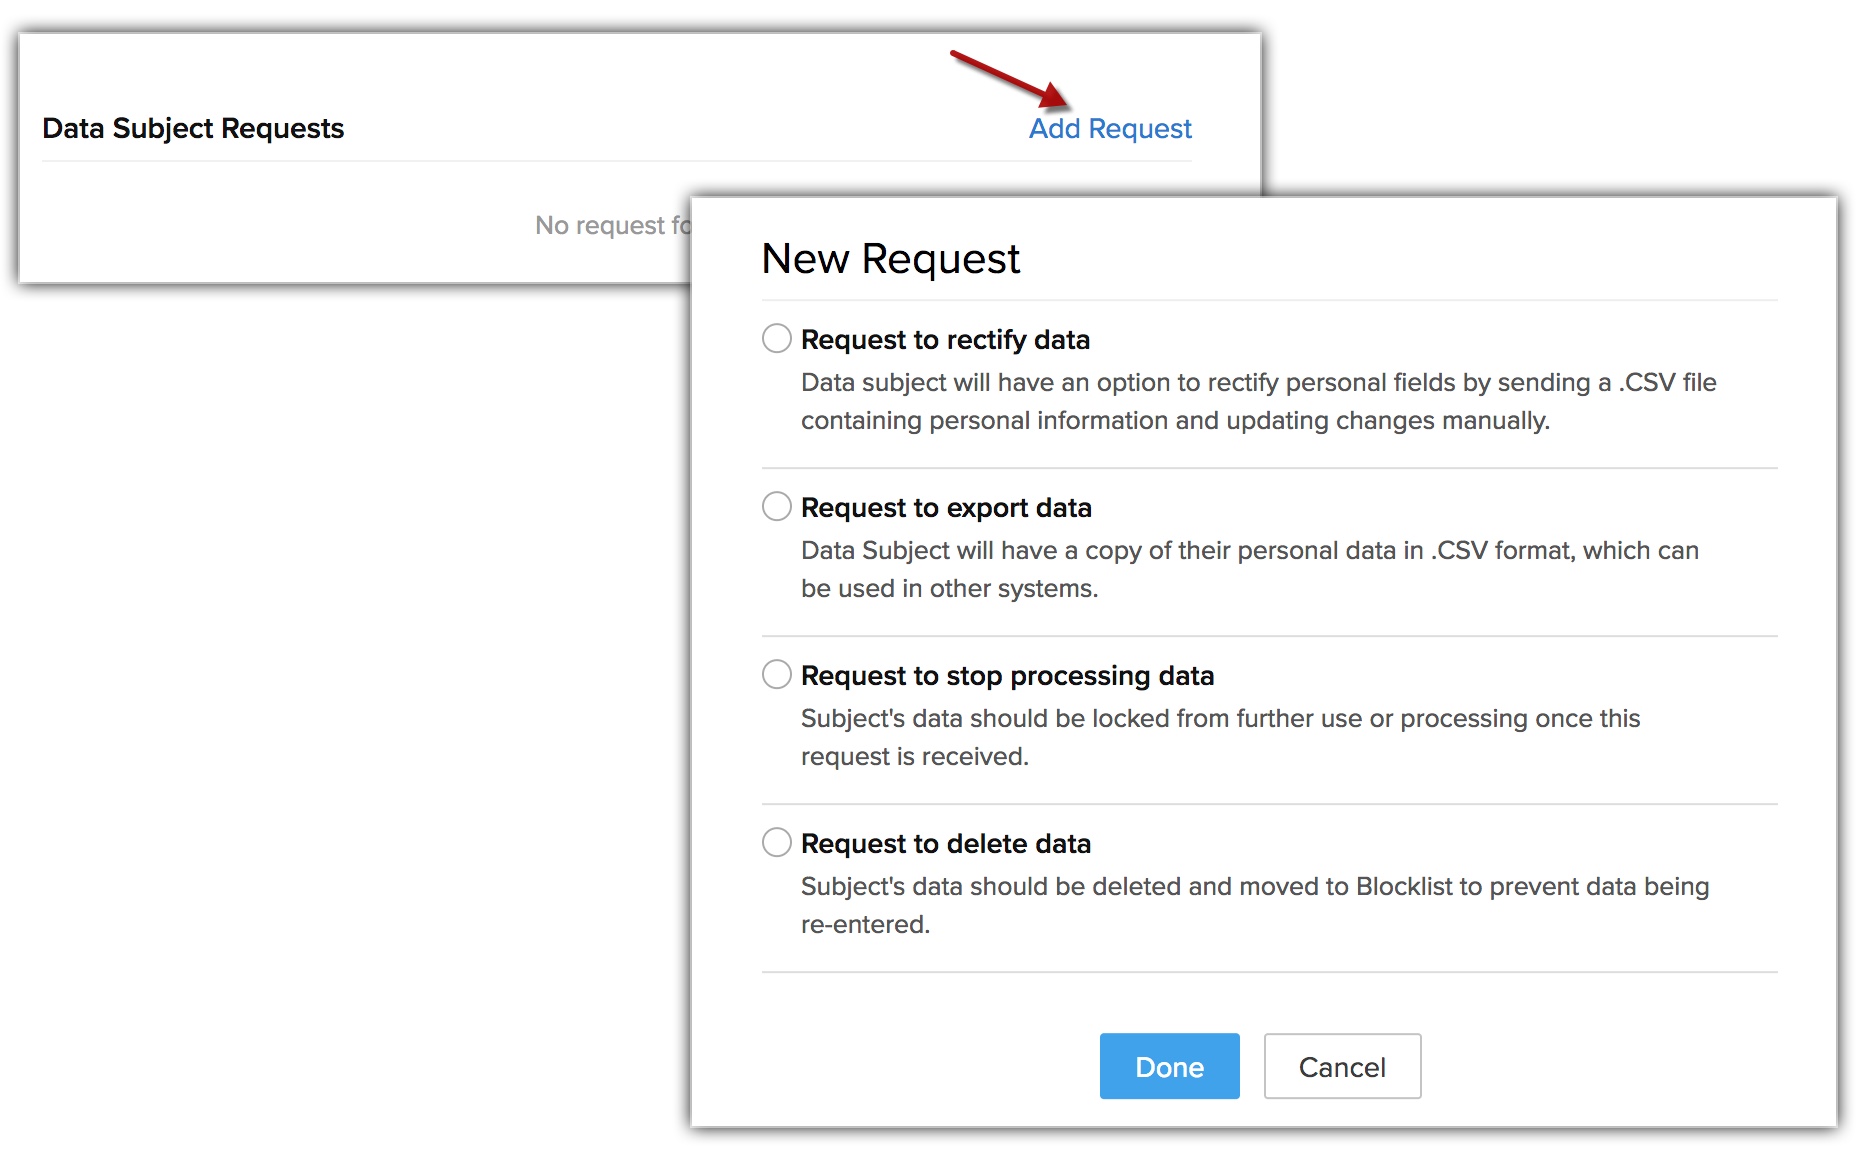
Data subject rights
- Right to delete
- Right to stop processing
- Right to export
- Right to rectify
They can also add requests in the portal on behalf of the contacts or leads that they add to the portal. See Also Data Subject Rights
Related Articles
Adding, Importing, Modifying, and Re-inviting Users
In Zoho CRM, a user is one who manages records, whether their own or those shared by other users, within the organization. In addition to accessing the CRM data, some of the users can perform administrative functions for the smooth running of the CRM ...Setting up SalesIQ Integration
Zoho SalesIQ integration with Zoho CRM, also called as Visitor Tracking, allows you to engage with people visiting your website through chat and push their information into CRM. You can also embed a chat widget on your webpage and converse with the ...What is the difference between 'users' and 'customer portal users'?
Anyone whose email address is mapped to a user license from your account is a CRM user. A Zoho CRM user is someone who can manage records, either their own or those shared by other users, within the organization. In short, any employee ...Setting Email Preferences
CRM users perform a variety of activities depending on their position in the organization and as a part of individual's job responsibility. To accomplish these activities the administrators provide users with appropriate access levels to various ...Setting Email Notifications
Email Notifications are among the instant and scheduled actions associated with different automations in CRM. They are alerts, notifications, information, or details sent to leads, contacts and users within the organization. When you associate an ...