Ticket Timeline View
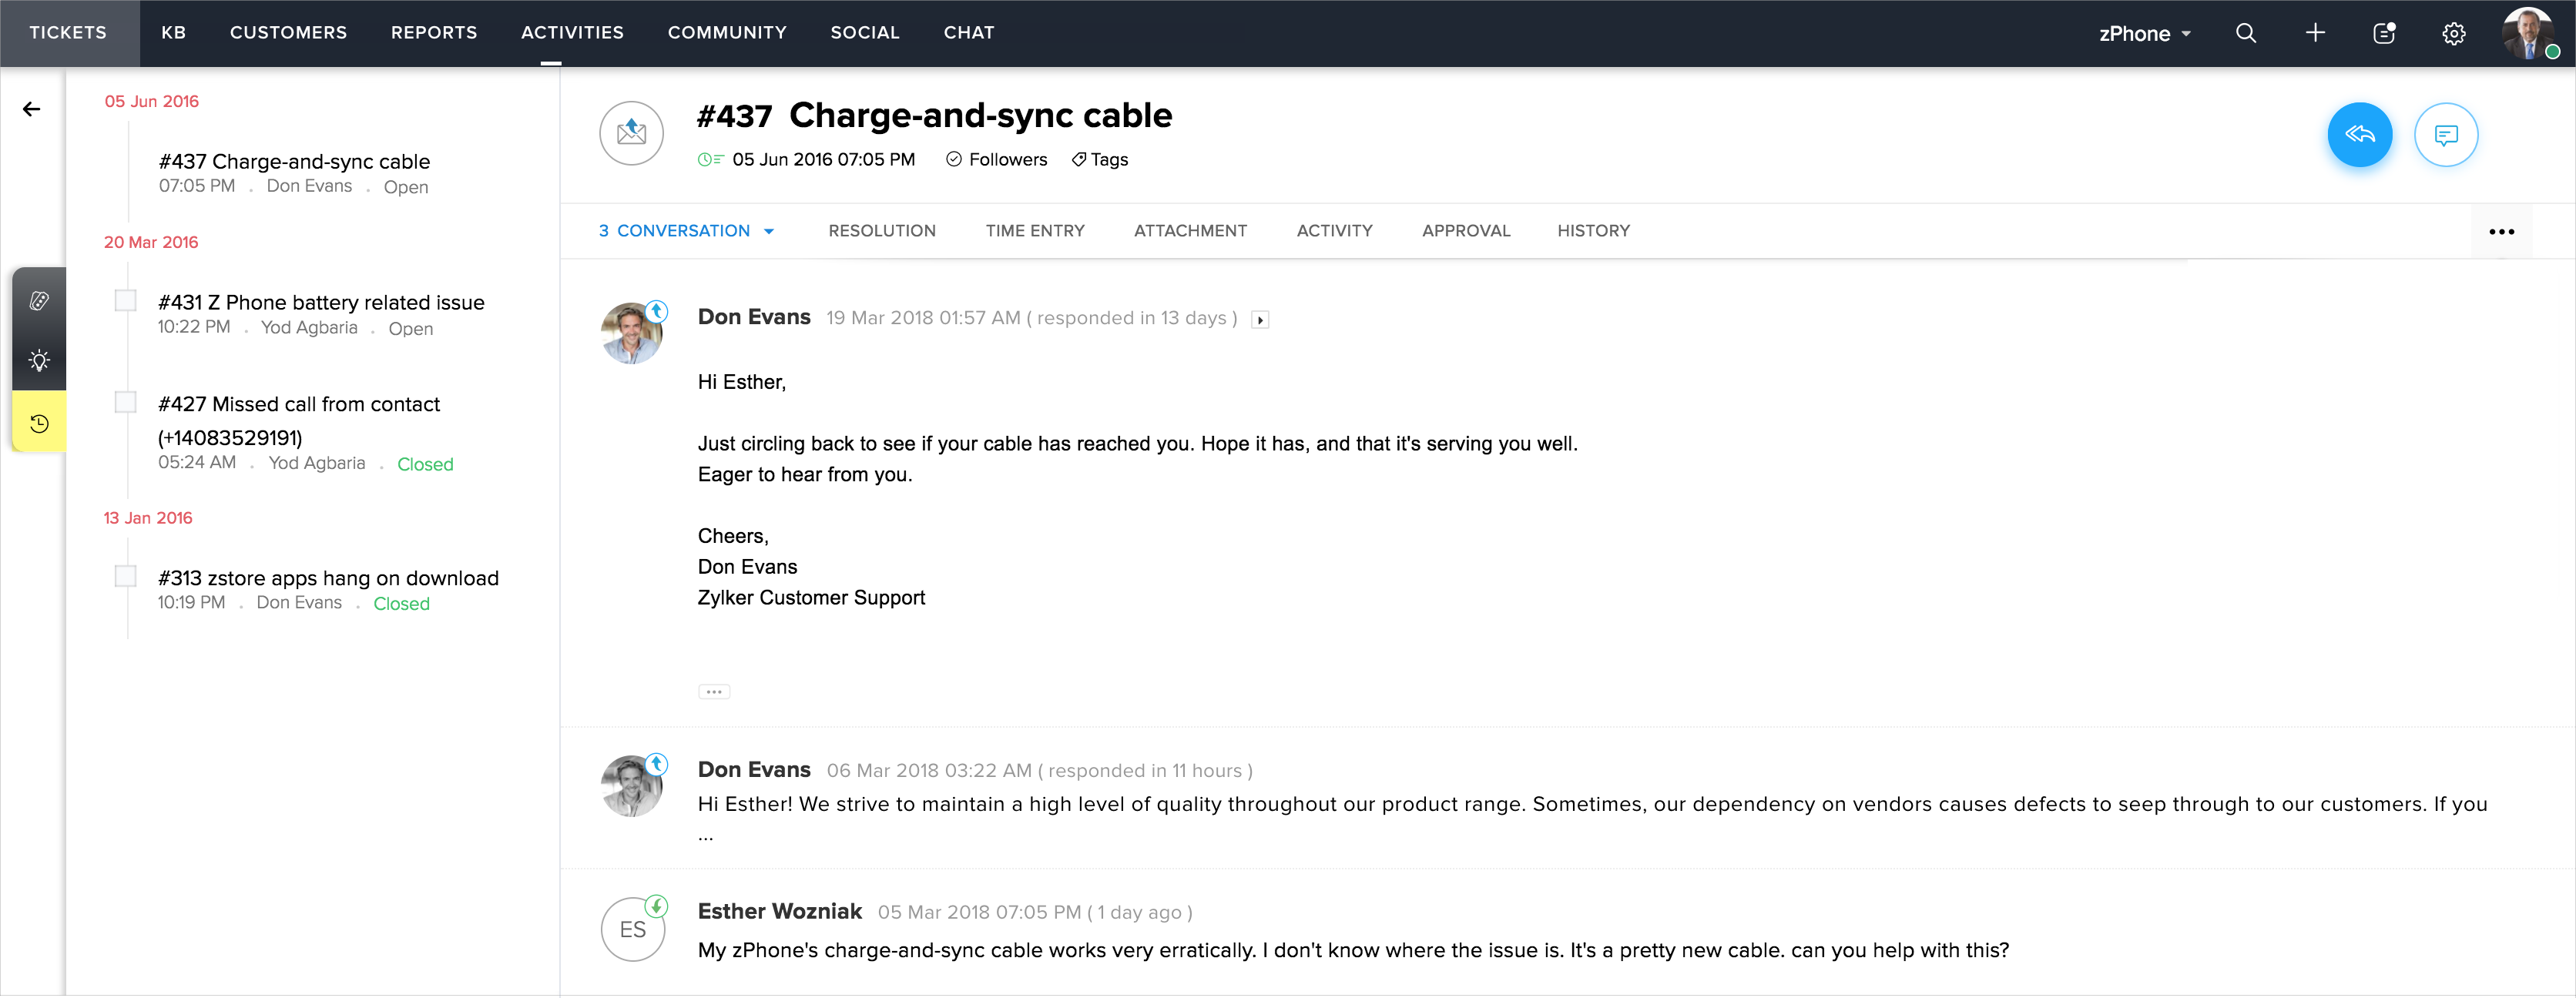
The Timeline view provides an overview of the tickets received from a customer over the recent past. It will fetch the tickets received from a contact and presents them in chronological order.
Advantages of Timeline View
- It helps your agents to know whether the customer is new or returning.
- You can drive targeted engagement by assigning the ticket to an agent who has handled the customer on previous occasions.
- Determine your customer's frame of mind by looking at their rating on previous tickets.
- Understand the context of the current ticket by looking at the solutions offered previously.
- Merge tickets if you have received more than one about the same issue.
To view the timeline of a ticket:
- Open a ticket to view its details.
- Click the Timeline icon (
) in the left panel.
The timeline will display the Subject, Ticket Owner, and Status of the tickets received from the customer. If there aren't any prior tickets, the timeline will display the current ticket.

To merge tickets in the timeline:
- Open a ticket to view its details.
- Click the Timeline icon (
) in the left panel.
- Check the tickets you want to merge in the timeline.
- Click Merge at the bottom of the timeline.
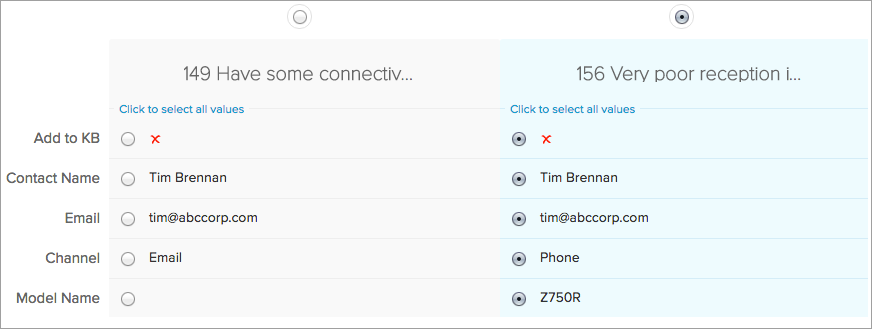
- Select the fields from the tickets, for its data to be retained in the Master Ticket.
- Click Merge again.

Here are some Tips to help you Merge Tickets:
- You cannot merge more than three tickets at an instance.
- The ticket that was first created in your help desk is considered as the master ticket. You can also specify the master ticket (by their Ticket Id) to be created.
- The master ticket will keep the date and time of its creation besides other read-only or hidden field values.
- The values that are selected amongst the tickets will be merged into the master ticket.
- All the records including attachments, activities, products, etc., from the other tickets, will be added to the master ticket.
- Please exercise caution as you cannot undo or revert a ticket merge.
Related Articles
Customer Ticket History for Zoho Desk
When new tickets are assigned, it is important to show your agents the past support tickets of the customer so that your agents can have more direct, effective, and meaningful conversations. The Customer Ticket History extension for Zoho Desk ...Why can't I find the merge option for tickets?
It is quite common for customers to seek your attention by contacting you through different support channels. It also happens that different people in the account might report the same issue. In these situations, you can merge all the tickets to save ...Get Ticket History API - Explained in Detail
Introduction This API fetches details of all actions performed on a ticket and in the sub-tabs on the ticket detail page. Request Format GET: api/v1/tickets/{ticket_Id}/History Query Parameters from - int - Index number, starting from which the ...Ticket Status Lifecycle Extension for Zoho Desk
A ticket can go through various statuses once it gets created. For example, upon its creation, ticket status is Open. When an agent replies to the ticket, its status will change to Resolved. Similarly, if the customer responds to the same ticket, ...Events Supported in the Get Ticket History API
Introduction The Get ticket history API returns details of the actions — called events — performed on a ticket. In this document, you will learn about the different events supported and the variations of each event. Ticket History Events Each event ...