Sending Mass Emails
One of the most important activities in business is communication with the customers and the best way to do so is through emails. Zoho CRM provides the option of using mass email to reach a large number of customers. You can also create auto responders, schedule mass emails, monitor and create email templates that are ready to use. Below are a few benefits of mass email:
- Save time in sending emails to an entire list of customers.
- Create new mailing lists based on business requirements.
- Schedule emails to send at a specific time, according to your convenience.
- Allow customers to subscribe or unsubscribe from the mailing list using Email opt-out.

- The Mass Email feature is available for Leads, Contacts, Deals and all the custom modules. In Zoho CRM, you can send mass emails to customers with respect to your business requirements. For example, you can send updates, or personalized follow-up emails to the customers in bulk. Mass emails cannot be considered as a replacement for email campaigns softwares and tools. In CRM, the purpose of mass emails is to ease your business process.
- Before sending emails, ensure that the record contains a valid email address.
- Email address from template option will be available if you have already configured from and reply to in templates.
- You can send mass emails based on your Zoho CRM edition. For a given scheduled time only three mass email processes are possible. See Also Email Limits
- You need to create email templates before sending mass emails. See Also Email Templates
Send and Schedule Mass Emails
In Zoho CRM, you can send bulk emails either immediately or schedule it for a particular time. For example, if you want to send an email to few customers at 10 AM PST, but you will be busy in a meeting at that time; you can easily schedule the email for that particular time. For a given scheduled time you can schedule 5 mass email processes per module. There are three options from where you can choose the email recipients:
- Module list view
- Custom view
- Contacts based on criteria
I) Send mass email from module list view
- Select any Module.
- Choose Records from the list of records > click Send Email.
- In the Mass Email popup, select an Email Template.
Alternately, you can click on Create Template link to create a new template.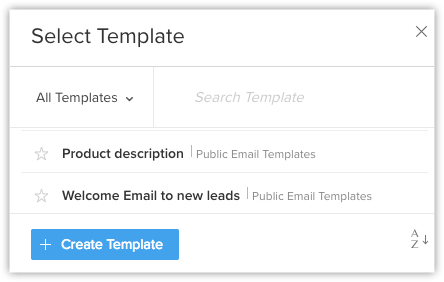
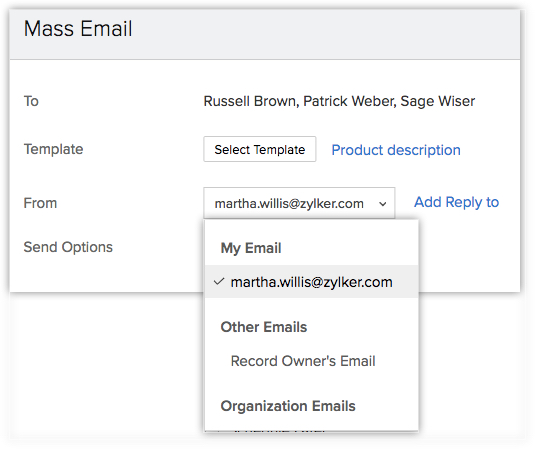
- Under From and Add Reply to fields, do the following:
- By default, your email address will be displayed in both the fields. However, you can choose one of these option from the drop-down list:
- Email address of the record owner.
- Organization email address.
- Email address of the record owner.
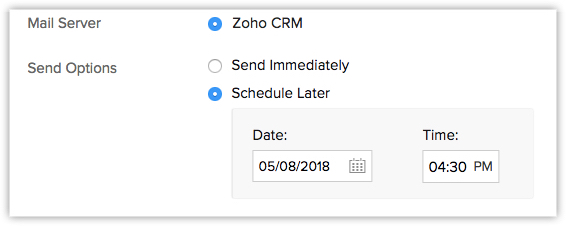
- Under Send Options, do the following:
- Click Send immediately to send the email right away.
- Click Schedule Later, to send the email later. Enter the Date and Time for scheduling the emails.
- Click Send immediately to send the email right away.
- Click Send or Schedule.
II) Send mass email from custom view
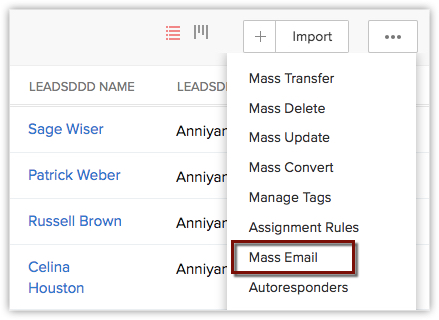
- In the Module List View page, click the More icon.
- Select Mass Email from the list of options.
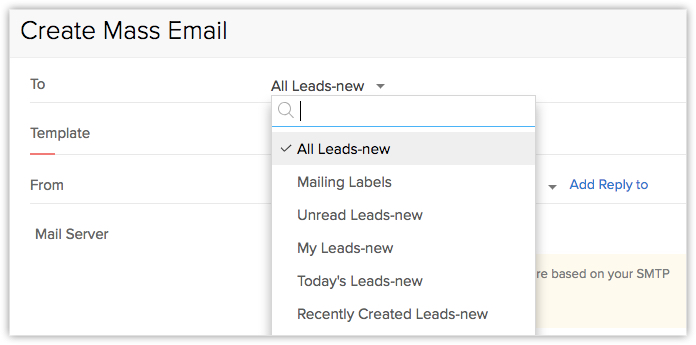
- In the Mass Email Summary page, click Create Mass Email.
- Select recipients from the custom view in the drop-down list.
- Select an Email Template and repeat the above steps to send or schedule the mass email.
III) Send mass email based on criteria
- In the Module List View page, click the More icon.
- Select Mass Email from the list of options.
- In the Mass Email summary page, click Create Mass Email.
- Under To, click Based on Criteria from the drop-down list.
- In Specify Criteria, enter the details.
- Click Save.

- Select an Email Template and repeat the above steps to send or schedule the mass email.
Set Trigger Action in Mass Email
You can set trigger actions like field update, follow-up task or call scheduling when the emails are either opened, clicked or bounced.
For example, you can set a follow-up task like send product details once the contact has opened or clicked the email. Similarly, you can set a field update if the email has bounced.
Below are few email criterias for which you can set trigger actions:
- Email is opened or clicked - Whenever a mass email is opened or clicked by the recipient you can set a trigger action like field update, follow-up task or call scheduling.
- Email is bounced - If a mass email has bounced you can set a trigger action for field update only.
To set a trigger action
- In the Mass Email popup, click Trigger an action.
- Select a Trigger from the drop-down list.
- Email is opened
- Email is clicked
- Email is bounced
- Email is opened
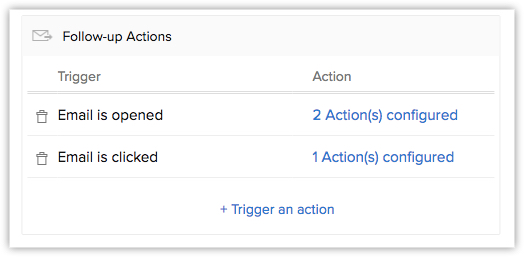
- Choose an Action > click Configure and do the following:
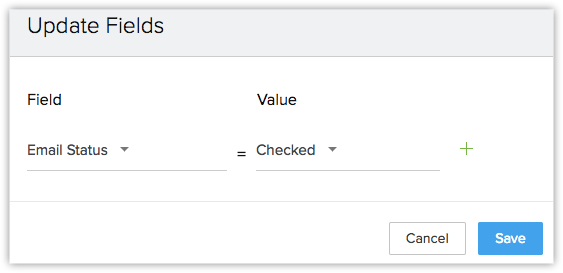
- Update Fields - Choose a field that should be updated when the email is opened, clicked or bounced.
- In the Update Fields popup, select a Field from the drop-down list and enter a corresponding Value.
- Click Save.
- In the Update Fields popup, select a Field from the drop-down list and enter a corresponding Value.
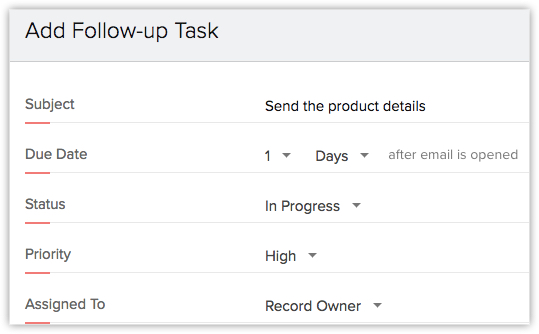
- Add Follow-up task - Choose this to add a follow-up task to the records for the emails that are opened or clicked.
- In the Add Follow-up Task popup, enter the Details like subject, due date, status, priority and assigned to.
- Click Done.
- In the Add Follow-up Task popup, enter the Details like subject, due date, status, priority and assigned to.
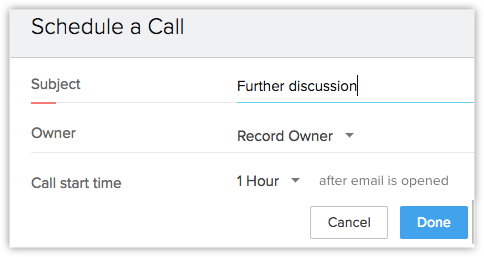
- Schedule a call - Select this to schedule a call if the email is opened or clicked.
- In the Schedule a call popup, type the Subject.
- Choose an Owner from the drop-down list.
- Select the Call start time.
- Click Done.
- In the Schedule a call popup, type the Subject.
- Click Done.
- For bounced emails you can only update a field, you will not be allowed to add follow-up tasks or schedule calls.
- For each trigger action, you can add up to 3 field updates, 2 follow-up tasks and 2 schedule calls.
Add Follow-up Emails to Mass Emails
While sending mass emails to the recipients you can also schedule follow-up emails that can be sent after a defined period of time. Say you send welcome email to the customers on Day 1, you can add a follow-up email for the customers who have either received or opened the welcome email. You can either select the date on which the follow-up email should be sent or specify the number of days after which the follow-up email must be sent to the customers.
Additionally, you can specify the list of customers who should not receive the follow-up email. For example, you can set a criteria for not sending the follow-up email to the customers who have already purchased a product. You can also add a trigger action in the follow-up email.
- If you choose to send a follow-up email to the customers who have opened the first email. You will not be allowed to select a particular date for the follow-up email. You will have to specify the number of days after which the follow-up email must be sent.
- You can add up to 3 follow-up emails to a mass email.
To add follow-up email
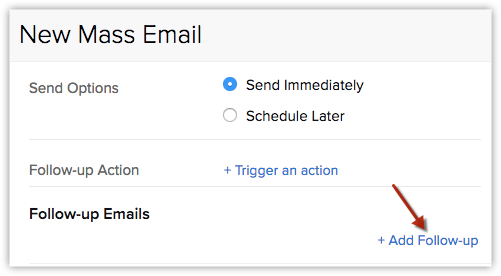
- In the Mass Email summary page, click Create Mass Email.
- Scroll to Follow-up Emails, click Add Follow-up.
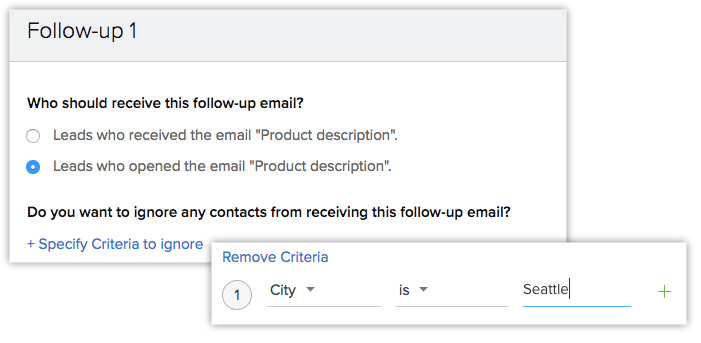
- In the Follow-up popup, choose Who should receive the follow-up email?
- Click Specify Criteria to ignore if you want to restrict few recipients from receiving an email.
- Select an Email Template.
- Enter the Days or Select a Date from the Calendar in When should the follow-up email be sent?
- Click Add.
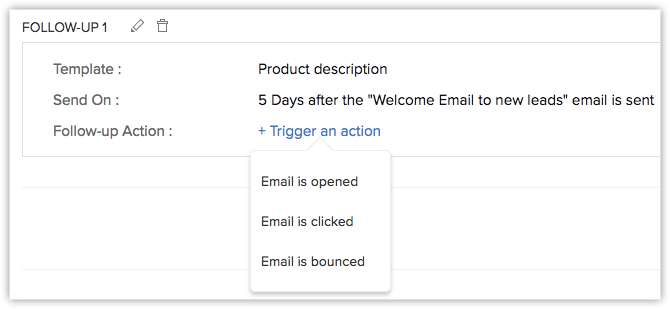
- In Follow-up Action, click Trigger an Action and select a trigger from the drop-down list.
Edit, Stop or Delete Emails
From the Mass Email summary page, you can view the list of emails that are scheduled, sent and stopped. The emails that are stopped or scheduled will be displayed in the respective folders, you can choose to edit the same. You can perform the following actions in the emails:
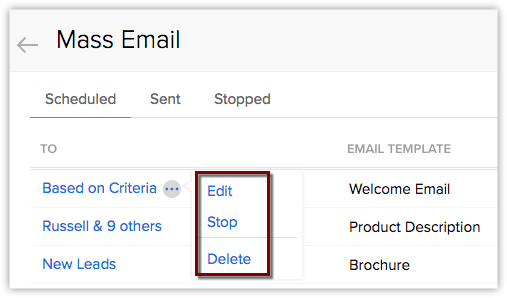
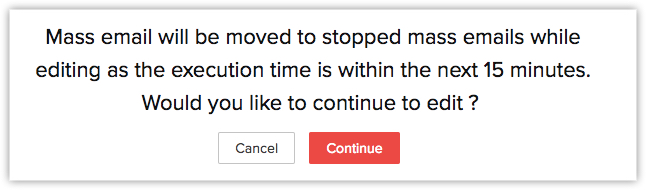
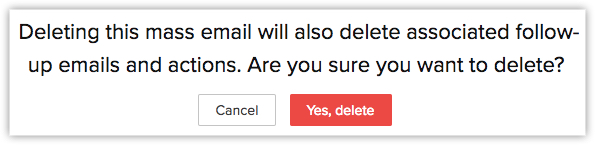
- Scheduled Emails - The mass and follow-up emails that are scheduled for a later delivery will be listed here. You can edit, stop or delete these emails. If you choose to edit a scheduled email 15 minutes prior to its delivery time, the email will be moved to the stopped list. Deleting a mass email would also delete the associated follow-up emails.
- Sent Emails - The emails that are sent will be displayed here, you can choose to delete them if required. If the mass email has been sent and the follow-up email is yet to be sent; the follow-up email can be edited from sent email. In addition, from the sent email folder you can view the email statistics that displays the number of emails sent, bounced, delivered, undelivered, opened, clicked and not clicked.
- Stopped Emails - The emails that were not sent are listed under the stopped list. These emails can be edited, started or deleted. Deleting a stopped email would also delete any follow-up email associated to the mass email.
- A mass email can be edited, stopped or started only by the user who has created the mass email. Other users will only be allowed to view/delete the email.
- You can also try the Zoho Campaigns Integration to use the Leads and Contacts in CRM to carry out email campaigns. Additionally, you can track the clicks, bounce rates etc. and use the standard templates for the emails from within Zoho Campaigns.
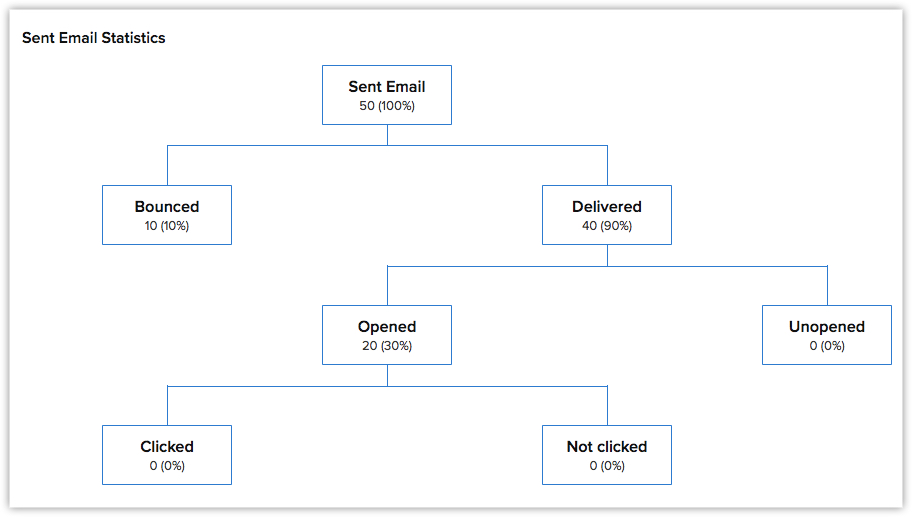
View Email Statistics
You can view the email statistics of a sent email from the Email Summary page. The statistics will display the number of emails that were sent, opened, clicked, bounced, delivered, unopened and not clicked. In addition, you can view the list of recipients by clicking on each of the categories.
To view email statistics
- Go to the Mass Email Summary page.
- Click on the Sent Emails and select any email.
- View the Email Statistics.
- Click on any category Opened or bounced to view the list of recipients.

Troubleshooting tips
Related Articles
How do I schedule mass emails to be sent at a particular date and time?
Scheduled mass email is available in the Professional, Enterprise, and Ultimate editions. Administrators or users with permission to send mass email can schedule mass emails. You can schedule up to 10 mass emails per module at a time. The available ...I am subscribed to the Free edition of CRM, can I send mass emails?
No, mass email is only available in the paid editions: Standard, Professional, Enterprise, and Ultimate. Mass emails can be scheduled in the Professional, Enterprise, and Ultimate editions of CRM. In the Standard edition, you can send 250 mass emails ...How can I update the pipeline and stage fields automatically after sending a mass email?
The pipeline and deal stage can be automatically updated through follow-up actions (field updates) after sending mass emails. When sending the mass email you can select the follow-up action by selecting the trigger for the action (email clicked, ...What are mass emails used for?
Mass emails allow you to send one message to a group of prospects or customers at the same time. For example, you can send announcements, newsletters, or transactional emails to prospects, or send follow-up emails to customers whose deals are in ...Sending and Receiving Mail
Get the sales context to your email communication by sending and receiving emails from right within Zoho CRM. With the Zoho Mail Add-on, you can send Emails to your Leads, Contacts and Deals modules. You need not switch to your email service to ...