Manage Business Hours
Business Hours defines the working hours of an organization and is typically based on the company's location. However, if your organization has offices in different countries the business hours followed at the headquarters may not comply with the offices in other time zones. To address this, Zoho CRM lets you create shift hours for different time zones.
For instance, your organization is located in the US and the business hours is 9 am to 5 pm in the US time zone, now if your company extends its services in other countries like Europe, Japan or India, you can create shift hours for these particular time zones. Similarly, if the employees in your organization work at different timings (afternoon shift, morning shift), you can create shifts for their work timings. Additionally, you can also create Holiday Lists for different locations and associate it to shifts.
Administrators and users with Manage users permission can only update business hours and shift hours and view users ascribed to them.
Set Business Hours
Use the Business Hours to define the working hours of your organization. Depending on the working hours of your organization, you can choose either 24/7 or 24/5 as the business hour. In addition, if your organization follows different timings on each day or functions on weekends, you can customize the business hours to suit your requirement.
To set business hours
- Go to Setup > General > Company Details > Business Hours .
- In the Business Hours page, click Create Business Hour .
- Select a Business Hour from the following list.a) 24 Hours x 7 Days - Select this option if your company operates 24/7. b) 24 Hours x 5 Days - Select this option if your company operates 24/5.
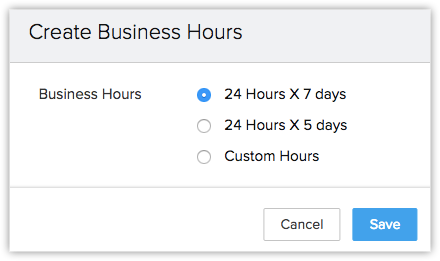 c) Custom Hours - Select this option if you want to customize the business days or hours.
- Same hours every day - Select this option if the business hours of the organization is same everyday and choose the timings from the drop-down list.
- Different hours every day - Select this option if the business hours of the organization varies each day and choose the timings from the drop-down list.
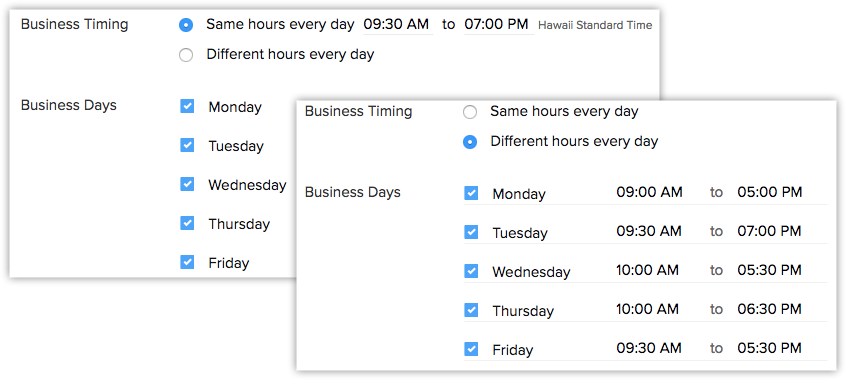
- Same hours every day - Select this option if the business hours of the organization is same everyday and choose the timings from the drop-down list.
- Click Save .
 Note
Note- While customizing the business hours, you can select the business timing as 24 Hours for both Same Hours Everyday and Different Hours Everyday.
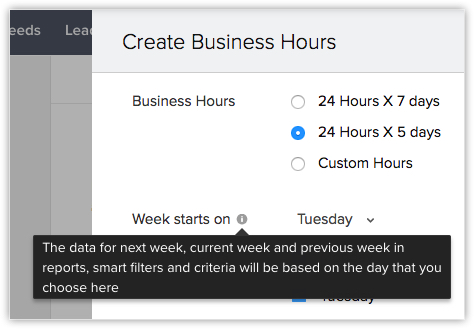
- While setting business hours, you can choose a particular day on which the week in your organization begins. Based on the day you choose, the data for next week, current week and previous week will be executed for Reports, Smart Filters and Criteria.
Create and Assign Shifts to Users
You can create shifts for users who work in different time zones or timings. For instance, if a user works for clients based at the US you can create a shift for the US time zone and assign it to the user. Also, depending on the business exigencies you can transfer an user from one shift to another. While transferring, you can choose to transfer the user immediately or at a later date. If a transfer is scheduled for a later date, you are allowed to select any date up till 6 months.
A) To create shifts
- Go to Setup> Company Details > Business Hours .
- Click Create Shift Hours .
- In the Create Shift Hours page, enter the Shift name .
- Select the time zone from the drop-down list.
- In Shift hours,a) Same Hours Everyday - Select this option if the shift hour is same everyday and choose the timings from the drop-down list.b) Different Hours Everyday - Select this option if the shift hour varies each day and choose the timings from the drop-down list.
- Click Save .
B) To assign shift
- Edit the shift that your created.
- Select the users from the Assign To drop-down list.
- Click Done and then Save .
Note- You can create up to 50 shifts in your organization.
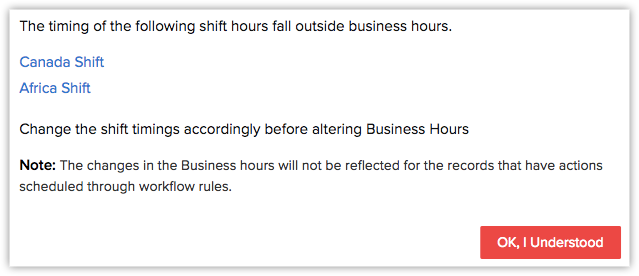
- If you edit the organization's business hour such that the shift's timing does not fall within the business hour, you will be alerted to edit the shift hours accordingly.
Add Break Hours
You can include the break hours for every shift, that will help know the users unavailability during a particular shift. It will help you plan the meetings according to a users availability. Also, if a meeting is created during the break hours an alert will be thrown notifying about the users unavailability.
Similar to shift hours, you can choose the same or different break hours for each day in a week. Below are few important points you need to consider before defining the break hours:
- One shift can have a maximum of two break hours.
- Break hours must comply with the shift hours.
To add break hours
- After defining the shift hours, go to Break Hours.
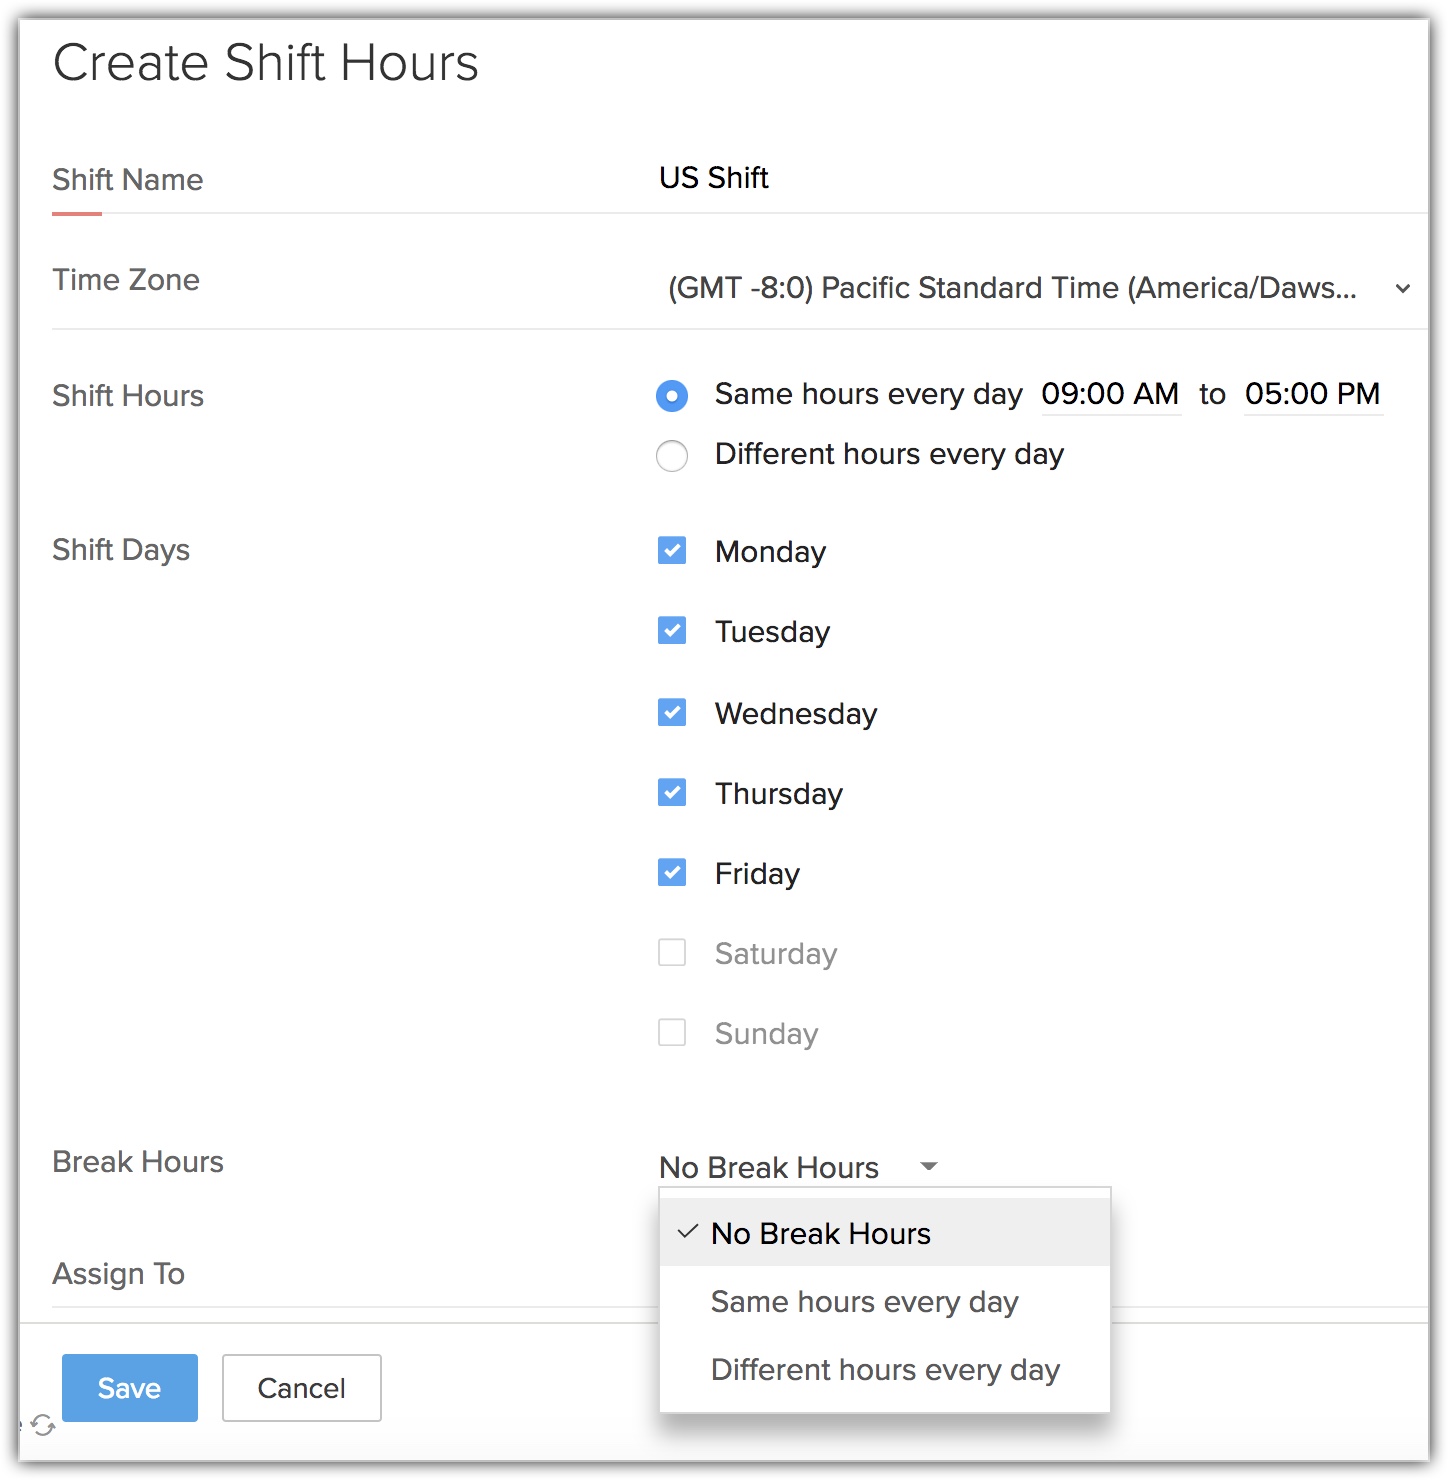
- Select Same hours every day or Different hours every day from the drop-down list.
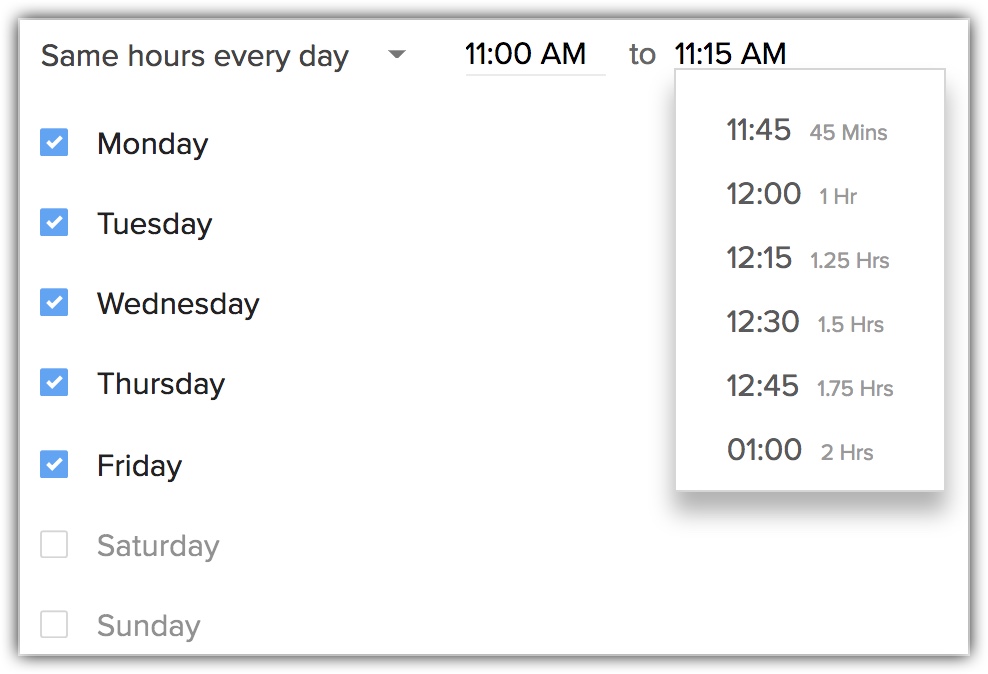
- Select the time from the drop-down list.
- Click Done and Save .
Create Holiday Lists
In Zoho CRM you can create a holiday list depending on different locations. Each shift can be associated to a single holiday list per year at a given point of time. You can create a holiday list for the current as well as the forthcoming year.
Business holidays are common to all employees across the organization. For example for users working in different shifts , say in US, UK, Germany, etc the business holiday will apply to all users irrespective of their shift.
- Go to Setup > Company Details > Holidays.
- In Holidays Details page, click Create Holiday List.
- In Select Year, choose the year from the drop-down list
- In Apply To, select Business Holiday or choose shift(s) from the drop-down list. (Options to choose shifts will appear only if shifts are created.
- Under Holiday list, enter Holiday Name and select the Date from the calendar.
- Click the plus icon to add more holidays.
- Click Save.
B) To edit a holiday list
- In the Holiday Details page, click the Edit button next to the holiday list.
- Add/delete holidays or edit details in the existing holidays.
- Edit the Apply To dropdown if you wish to
- Click Save.
- In the Holiday Details page, click the Clone button next to the holidays list.
- Add/delete holidays or edit details in the existing holidays.
- Edit the Select Year and Apply To dropdowns if you wish to.
- Click Save.
Mark As Unavailable in the Calendar
You can mark yourself unavailable for a particular time of the day in the Zoho CRM calendar, this will ensure that the user is alerted about your unavailability if a meeting is created for that time. Also note that the created Business and Shift Holidays will also be automatically shown as unavailable if a meeting is created for those holidays.
To mark yourself unavailable
- Click the Calendar icon in the top panel.
- Choose a Date > Create .Alternately, you can right click on the specific date.
- Select Mark As Unavailable .
- In the pop-up, select the Date and Time .
- Enter Comments , if required.
- Click Save.

If private meetings are imported from other sources (google calendar sync), those will be created as "unavailable" meetings in the CRM calendar.How Business Hours, Business Holidays, and Shift Holidays Influences Other CRM Functions
Assigning Meetings
You can assign a meeting to the user based on their availability. If a meeting is assigned on a day which is either marked unavailable or not a working day of the user, you will be alerted to reschedule the meeting to another day. You can either reschedule or assign it anyway irrespective of the user's availability.
Setting Due Date in Repeat Meetings
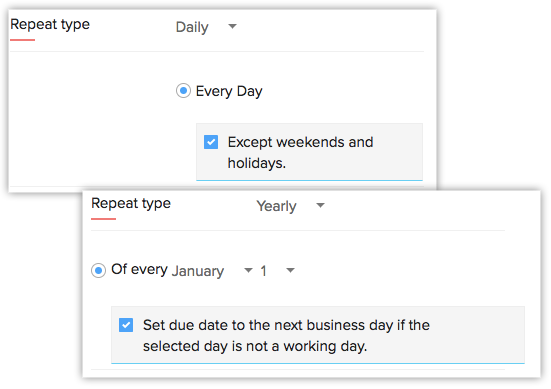
If a meeting in your organization repeats at regular intervals, you can skip the weekends and holidays. For meetings that repeat daily you can skip the weekends and holidays. If the meeting repeats monthly or yearly you can avoid it from repeating on a non-working day of the user.
To skip meetings on non-working days,
- Select the Repeat Type from the drop-down list and do the following:a) Daily - Click Except weekends and holidays .b) Custom - Select Monthly/Yearly from the drop-down list.c) Click the checkbox Reschedule meetings to the next working day if the selected day is not a working day .
- Click Done.
Setting Due Date in Repeat Tasks
If a task gets repeated everyday you can skip the weekends and holidays, similarly if a task is repeated yearly or monthly you can skip the non-working day of the user.
To skip tasks on non-working days,
- Select the Repeat Type from the drop-down list and do the following:a) Daily - Click Except weekends and holidays.b) Custom - Select Monthly/Yearly from the drop-down list.c) Click Set due date to the next business day if the selected day is not a working day .
- Click Done.
Workflow Rules
Date/Date Time Based Trigger
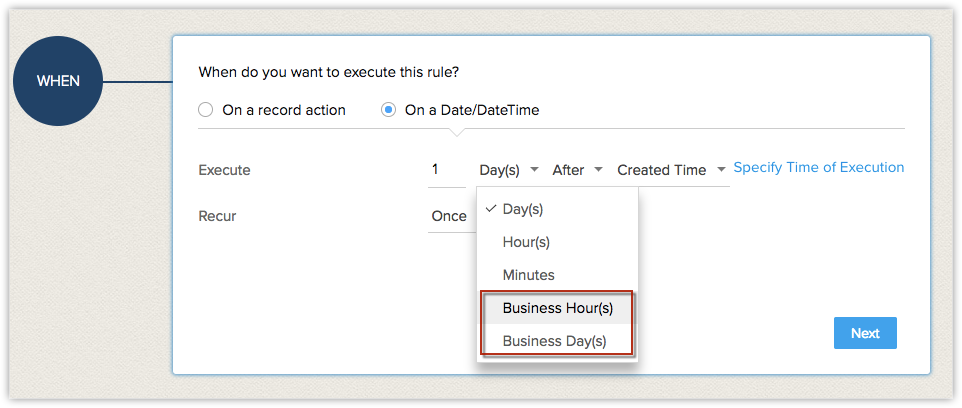
You can set the workflow rule to trigger either after or before "n" business days/hours to skip non-working day of the user.
To select the date/time,
- In Workflow Rules, select Rule Criteria>When do you want to execute this rule?
- Select On a Date/Date Time.
- In Execute, enter the Number of days/hours .
- Select Business hour(s)/Business day(s) from the drop-down list.
- Click Next.
Instant Actions
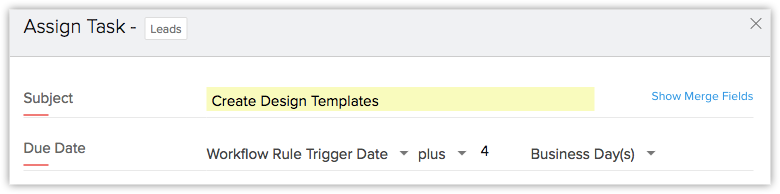
While creating tasks as an instant action you can choose the due date to skip the non-working days.
To skip non-working days,
- In the Instant Action , select Task.
- In the Assign Task pop up, select Business Days from the drop-down list.
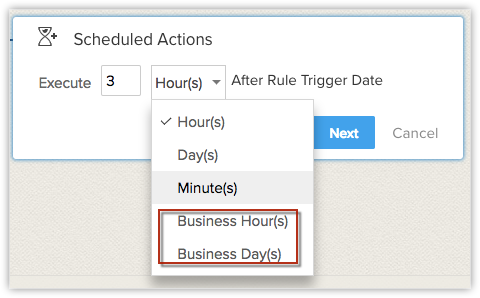
Schedule Actions
Schedule actions can be set to trigger after "n" business days/hours to skip the non-working day of the user.
To skip non-working days,
- Click Scheduled Actions.
- In Execute, enter the number of days.
- Select Business Hour(s)/Business Day(s) from the drop-down list.
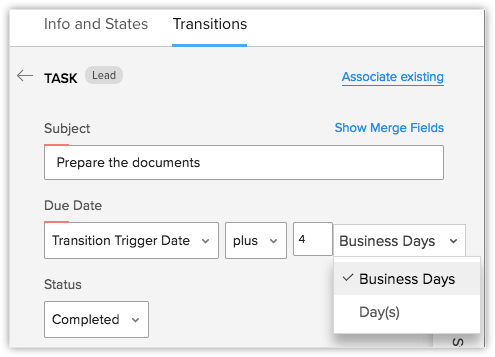
Tasks in Blueprint Transition
While defining a task in blueprint transitions you can skip the non-working day of the user, to ensure that the due date is scheduled when the user is available.
To skip non-working days,
- In the Blueprint Transitions, click After.
- Select Task, in Due date enter the number of days.
- Select Business Days from the drop-down list.
- Click Save.
Related Articles
Business Hours
Define the business hours and various shift hours of your organization Help guide Manage Business Hours Create Shift Hours Add Holidays for Different ShiftsManage Hierarchy Preference
A hierarchy structure in an organization is defined to rank members according to their designations. Zoho CRM provides two different hierarchy structures for your organization: Role Hierarchy and Reporting Hierarchy. You can select the hierarchy ...Manage Company Details
There are certain organization specific details, which help differentiate one organization from another. Zoho CRM recommends Users with Administrator's privilege to customize these company specific details, so that all users under an ...Manage Multiple Currencies
The multi-currency support in Zoho CRM helps you to handle business transactions in the global marketplace easily. If you regularly deal with international clients and vendors, then Multi-Currency will facilitate international buying and selling. ...Best CRM tools for your business to thrive remotely
The new era of work has redefined the way we operate, and do business. As new styles become prevalent, organizations are eagerly embracing co-working spaces, work from home, work on the go, and remote working as alternatives to traditional working ...