Identify prospects with Leads
Who is a visitor?
If a person leaves your website without providing any contact information such as email address, phone number, etc. that the operators could use to perform a follow-up, that person will be considered a visitor.
Wouldn’t it be great to observe the visitor’s visit-specific data such as which type of visitor visits your website, when they visited your site and how they reached your website?
Visitor History helps you find out more information about the visitor visiting your website. It reports precisely which type of visitor visits your website, how they reached your website, and what pages they’ve viewed. Best of all, this visitor information is stored under a unique ID even if their identity is unknown. With Visitor History, you will be able to recognize who your prospective customers are and proactively reach out to them.
In Visitor History, you can view the detailed information about your website visitors throughout their visits. Visitor history stores the behavior and action of each visitor during their stay. Using visitor history, you can learn more about a visitor's behavior. Visitor History stores visit-specific data such as Visitors' First and Last Visits, Duration of Each Visit, Pages Visited, etc.
How to view the Visitor History?
- In the SalesIQ dashboard, navigate to People > Visitors.
- Now you will see the list of all the recent visitors.
- You can also view your returning visitors, Today's visitors, New visitors, etc. by clicking the drop-down menu at the top next to All Visitors.
Visitor List
There are five types of default list available in the visitor history module. They are:
All Visitors: This list enlists all the visitors visiting your website.
Returning Visitors: This list separates the repeated visitors from the all visitors and lists them separately.
Today's Visitors: This list shows all the visitor who visited your website today.
Cold Visitor: The visitors who do not match any tracking criteria set will be categorized here.
New Visitors: The visitors who landed on your website for the very first time will be show here.
Create your custom list
You can also create your custom list by adding various rules. If the visitor satisfies those rules, they will be enlisted in the visitor list. To create your custom list:
- In the SalesIQ dashboard, Navigate to People > Visitor, click on the (+) icon next to the list type.
- Set your rules to filter out your desired visitor.
How to set rules to filter visitors
- Add a name to your list by clicking on the Add a Title on the top.
- Make a rule from one of the pre-defined conditions available.
- For example, here we want to categorize the visitors who use Mac Operating systems. First, select a predefined condition called 'operating system,' now pick 'is' to filter users using the selected operating system. Choose the type of operating system and click Save.
- After creating your first rule, you can add more rules to it by clicking 'or / and' next to add another rule.
- If you pick 'or' the visitor will be filtered if any one rule is satisfied.
- If you pick 'and' all the rules must be satisfied to be enlisted in the list.
- After adding the rules, click Save.
- Now, pick your custom list from the drop down on top, inside the Visitor History module.
Sort visitors in your custom list
- You can sort the visitor list by choosing an option from the Sort List By drop-down.
- Choose one of the sorting conditions based on which the order of the visitors will change.
- Frequent Visitor: The most frequent visitor will be displayed first.
- Top Lead Scoring Visitor: The list will start from the visitor who has the highest lead score.
- Visitor Spent more time: The list will start from the visitor who has spent the highest time on your website.
- Recent Visitor: The list will be ordered from the most recent visitor to the least.
Visitor Insights
The visitor's Name, Visitor Since, Visitor Behavior, Interests, CRM Info, Visits, Actions, etc., will be displayed here. Using this info, you can get a clear understanding of each visitor and their requirements.
To view detailed information of each visitor, click on the name of the visitor on the list. The Visitor Information tab will appear on the right side of the screen. The visitor details are split into three tabs, and they are:
- Visitor Info
- Conversation
- Activity
Visitor Info
SalesIQ collects lots of essential information about the visitor. You can view all those information in the Visitor info tab.
Personal Information
- Name: The unique ID generated for the visitor through which they can be identified.
- Address: Location of the visitor based on their IP address.
Visitor Information
- First visited: Date when the visitor first landed on your website.
- Recent visit: Date of the their last visit.
- No. of visits: Number of times the visitor landed on your website.
- No. of chats: Number of times the visitor has initiated a chat.
- Source: The source through which the visitor landed on your website.
- Campaigns
- Direct
- Search Engine
- AdWords
- Social Media
- Referral - To know the referrer link, hover over the referral.
- Frequency of Visit: Rate of visits by the visitor.
- Low
- Medium
- High
- Top Page: The most visited page by the visitor.
- Avg. time spent: The average time spent by the visitor on your website.
- Favorite operator: Most contacted and highly rated operator by the visitor.
- Rating: The feedback rating given by the visitor.
- Happy
- Neutral
- Sad
Edit visitor Details
We also have an option to update the visitor information manually. You can do so by following the steps given below:
- Click on the pencil icon next to the personal information.
- Enter the visitor details. Do remember that the email address field is mandatory.
- Click Save.

Note:
If you have integrated SalesIQ with Zoho CRM, the visitor details will be updated automatically in Zoho CRM once updated manually by the operator.
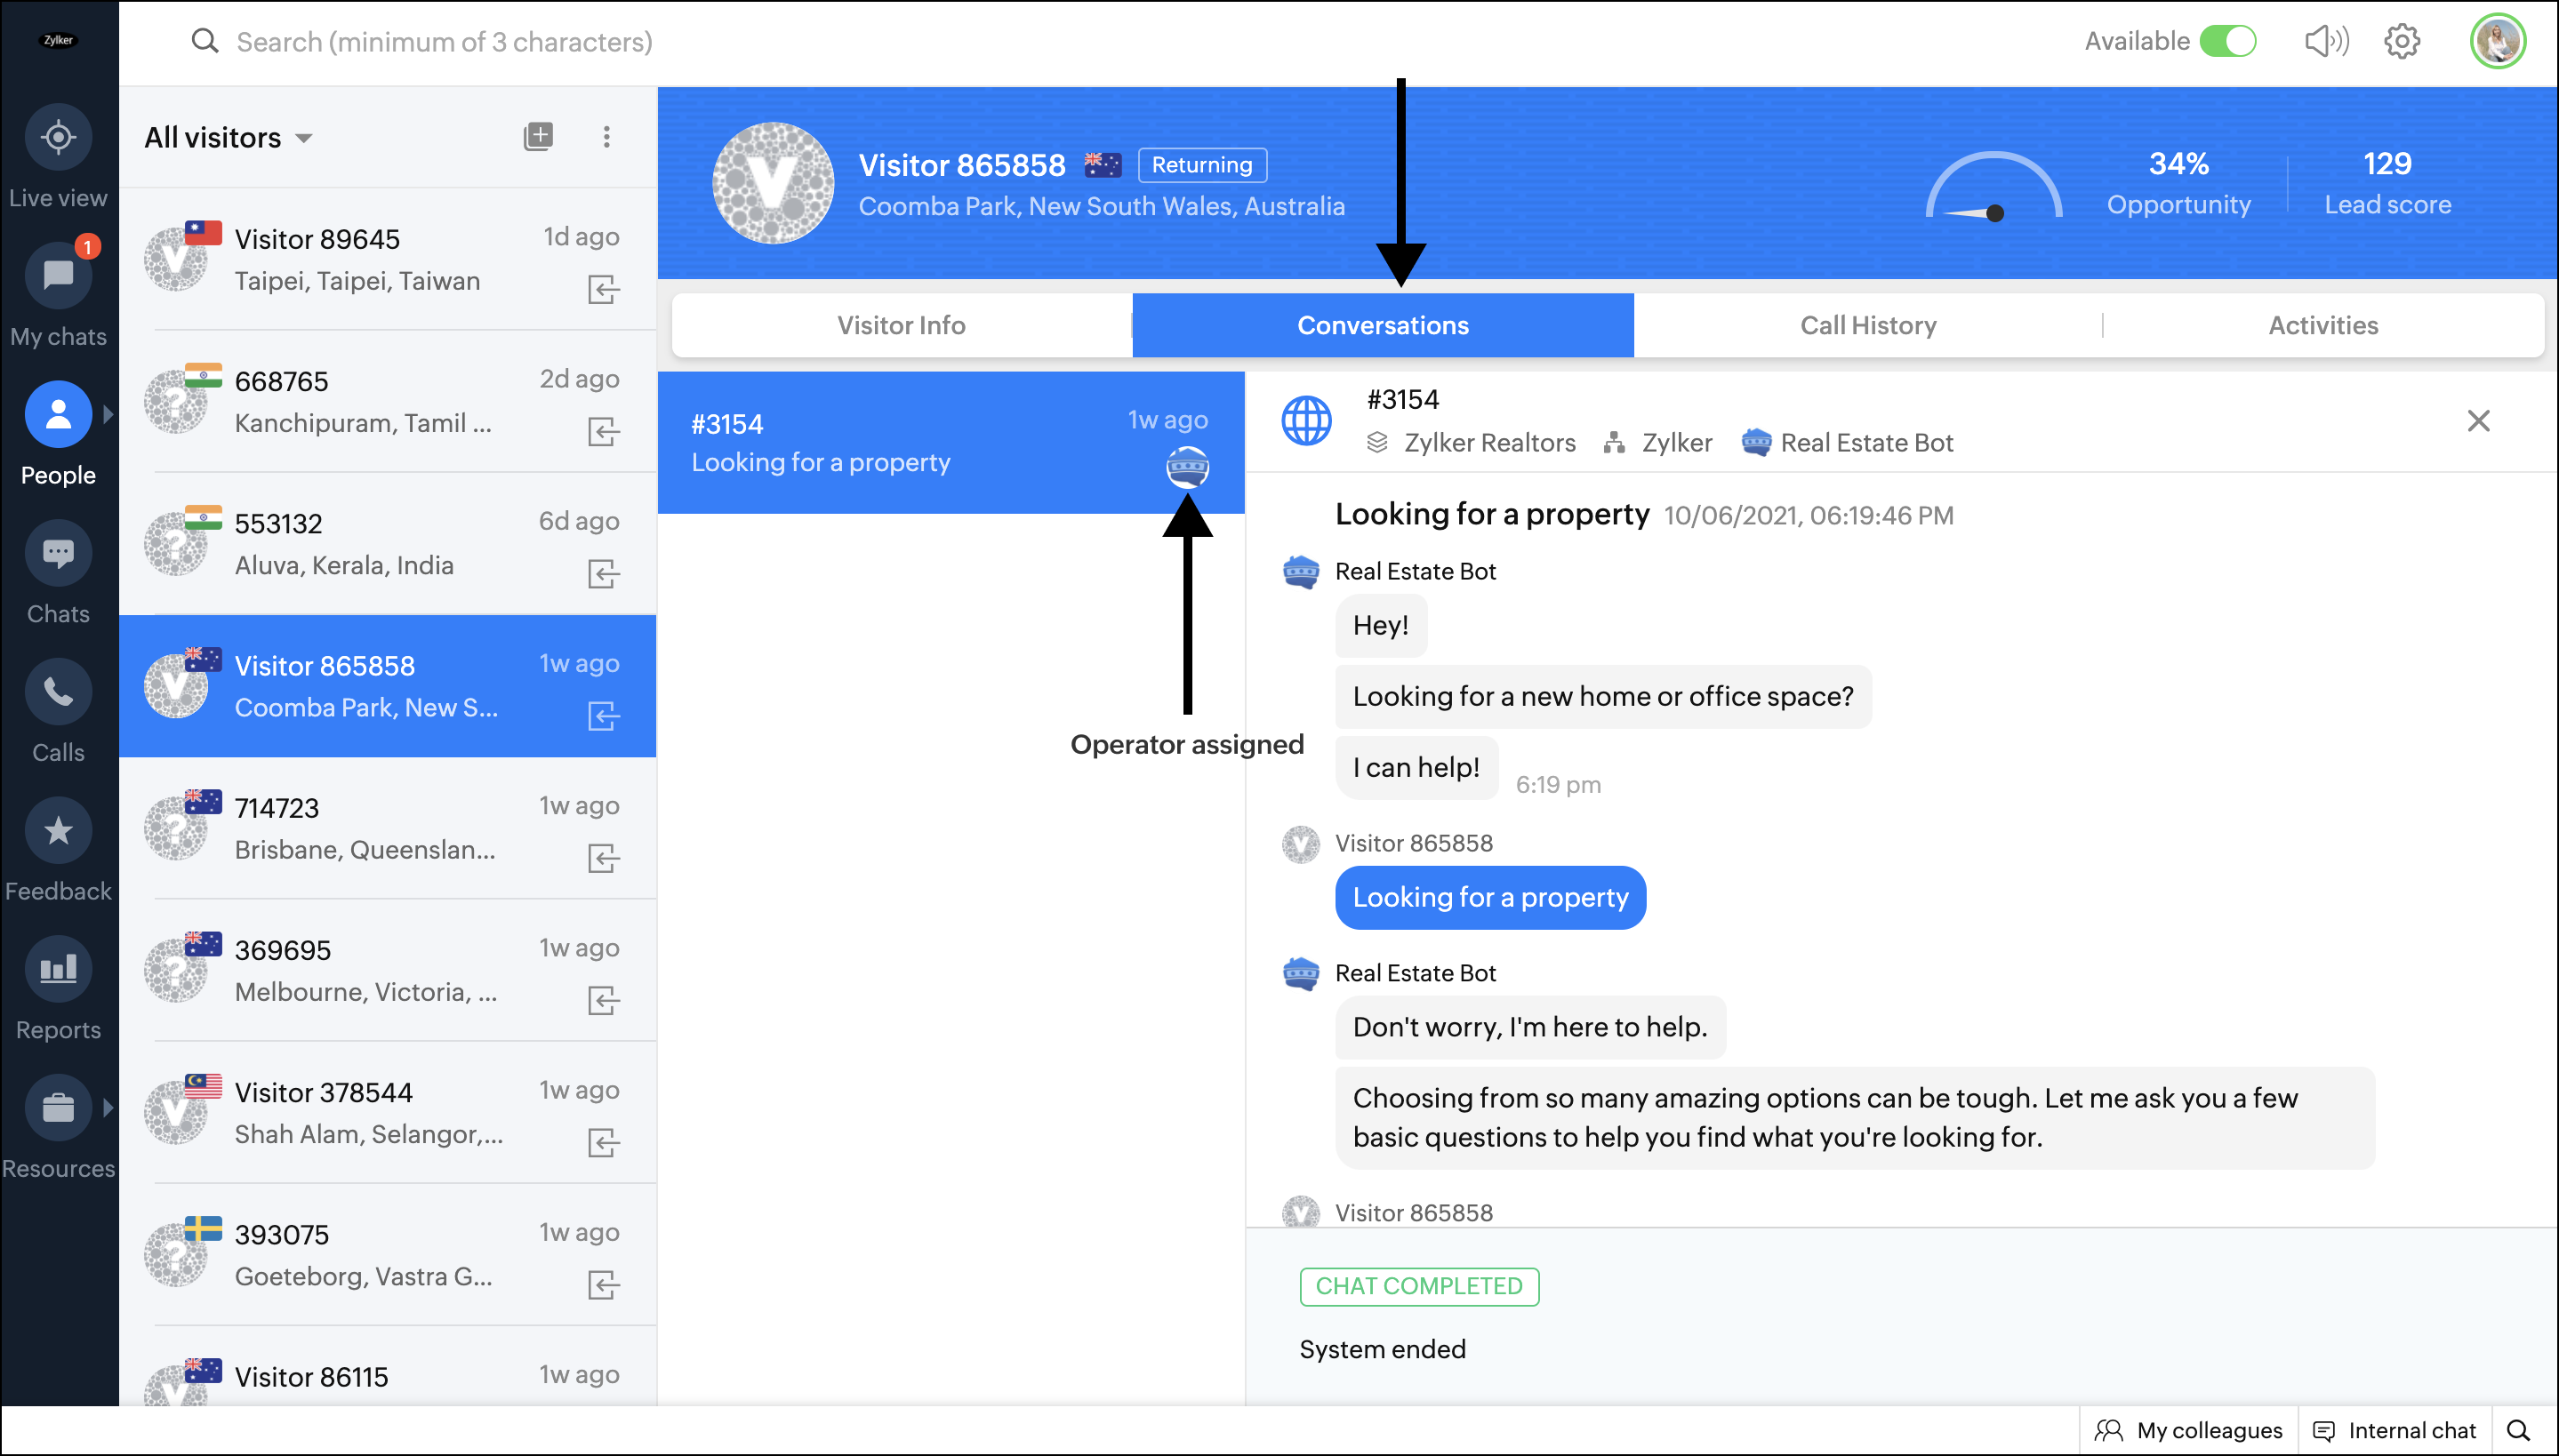
Conversation
All the conversation made by the visitor will be mentioned here. You can click on a specific chat to view the conversation in detail. The date and time, operator attended, and the status of the conversation will be displayed here. You can perform a follow up on the conversation by clicking Send Email at the bottom or the clicking the mail icon on the top right. The conversation can be used to analyze the visitor and approach them accordingly.
Activity
This section provides the entire list of actions performed by the website visitor and the actions carried out by the operator for the visitor.
The below details will be listed:
Landing Page - Clicking on the link will take you to the page visited by the visitor.
Date and Time of Visit - Date and time at which the visitor accessed the landing page.
Pages accessed - All the pages accessed by the visitor throughout the visit will be listed.
Chat Initiated - Clicking 'Chat initiated' will open the chat transcript, this will display only the initial chat sent to the visitor by the operator.
Chat Ended - Clicking on 'Chat ended' will open the chat transcript, this will display the entire chat conversation between the operator and the visitor.
Email Sent - To view the email sent to the visitor, click on the "Mail Sent" and the mail will be displayed in a separate column.
Note Added - Clicking on "Notes" will display the added notes in a separate column.
Related Articles
Lead Scoring
What is Lead Scoring? The score earned by visitors during their visits to your website is called Lead Score. You can set various criteria to score your website visitors based on their actions on your website and the visitor’s value in Zoho CRM. The ...Shopify
Engage prospects, track visitors and enhance customer service through SalesIQ. Assign rules and route hot leads to top reps. Shopify Installation through admin page Log into your Shopify administration area. Click on "Themes" Navigate to Actions > ...What are the Zoho SalesIQ - E-commerce integrations available?
A recent survey on connecting with online prospects illustrates, 71% of online shoppers expect access to live help when purchasing online within 5 minutes, whie 31% expect assistance to be immediate. The ability to prospect proactively and reach out ...Getresponse
What is GetResponse? GetResponse is an email marketing platform that enables you to create a valuable marketing list of prospects, partners, and clients, so you can develop relationships with them and build a responsive and profitable customer base. ...Integrating Zoho Analytics with SalesIQ
Overview What is Zoho Analytics? Zoho Analytics is a self-service BI and data analytics software that lets you visually analyze your data, create stunning data visualizations and discover hidden insights in minutes. Zoho Analytics in SalesIQ When you ...