Customize live chat widget and window
Float Widget
The float live chat widget is a handy way to attract your visitor's attention throughout your pages without intruding into their on-page experience as it "floats" along with your visitor's browser, even as they scroll down.
You can pick your desired float widget from various float widgets available in Zoho SalesIQ.
How do I change the float widget?
- To choose a different float widget, navigate to Settings > Brands > {Your brand name} > Personalize , select Stickers on the left-hand side menu.
- Under Float , pick your desired float widget and click Save.
Button Widget
Place the live chat button in any desired location on your page where you can get your customers' attention for immediate access to customer support. You can choose a button style from the many designs that SalesIQ provides out of the box.
How do I choose the button widget?
- To choose a different float widget, navigate to Settings > Brands > {Your brand name} > Personalize , select Stickers on the left-hand side menu.
- Under Button tab, pick your desired float widget and click Save .
Upload your custom sticker
If you are not satisfied with the widget designs you get out of the box or need a more personalized widget to better match your brand, you can add your custom sticker using the Upload your sticker option.
- In the Stickers page, click on the Upload online image option under the Custom Sticker - Float option.
- Now, upload an offline image to display a custom sticker during off hours.
- You can either drag and drop your sticker or pick the image from your computer.
Note : The sticker must be a square image, the recommended image dimension is a minimum of 50 x 50 pixels, and the maximum size is 1MB.
Customize chat widget content
Grab users' attention and make them engage with you by adding personalized content in your chat widget.
Customize Online Message
In the Stickers page, scroll down to Chat Widget Message - Online, enter your custom text in the Content and Byline Message, and click Save .
Customize Offline Message
In the Stickers page, scroll down to Chat Widget Message - Offline, enter your custom text in the Content and Byline Message, and click Save .
Set chat widget position
Position your chat float widget on the bottom right or left corner according to your preference or website design. By default, the widget is positioned on the bottom right corner, but if your website has important content on the right corner, you can place it on the left side.
- In the Stickers page, scroll to the Widget position section, choose the side you want to place the chat widget, and click Save .
Customizing the Chat Window Appearance
You can do the following customizations to your chat window:
- Choose the Appearance of the chat window according to website needs.
- Hand-pick a color of your choice for the chat window that suits your website.
- Display your company logo in the chat window.
- Show the profile picture of the operator while connecting with the visitor on chat.
- Redesign the window appearance completely with your Custom CSS File.
Customize the look of the Live Chat Window
- In Settings > Brands > Your brand name > Personalize, navigate to Appearance on the left-hand side menu.
- Now you can pick from one of the themes available. Click Save after you select your predefined theme.
Change the color of the chat window
The themes will come with the predefined colors out of the box. Sometimes the color might not match your website's image. So you can change the color of the chat window and widget by changing color to match your website.
- In Settings > Brands > Your brand name > Personalize, navigate to Appearance on the left-hand side menu.
- Scroll down to Pick A Color For Your Chat Window and choose a color from the list or use the color picker to select your desired color.
- You can either give the color code or pick a color from the color palette in the color picker.
- You can have an instant chat window preview on the right side of the screen. The colors you choose will reflect on the window.
Choose the size of your chat window
- In Settings > Brands > {Your brand name} > Personalize , navigate to Appearance on the left-hand side menu.
- Scroll down to Choose A Size For Your Chat Window . You can choose your chat window size between Small & Large according to your website needs.

Note : Choosing the chat window size is not applicable to mobile browsers. The size of the chat window on mobiles is based on the screen size.
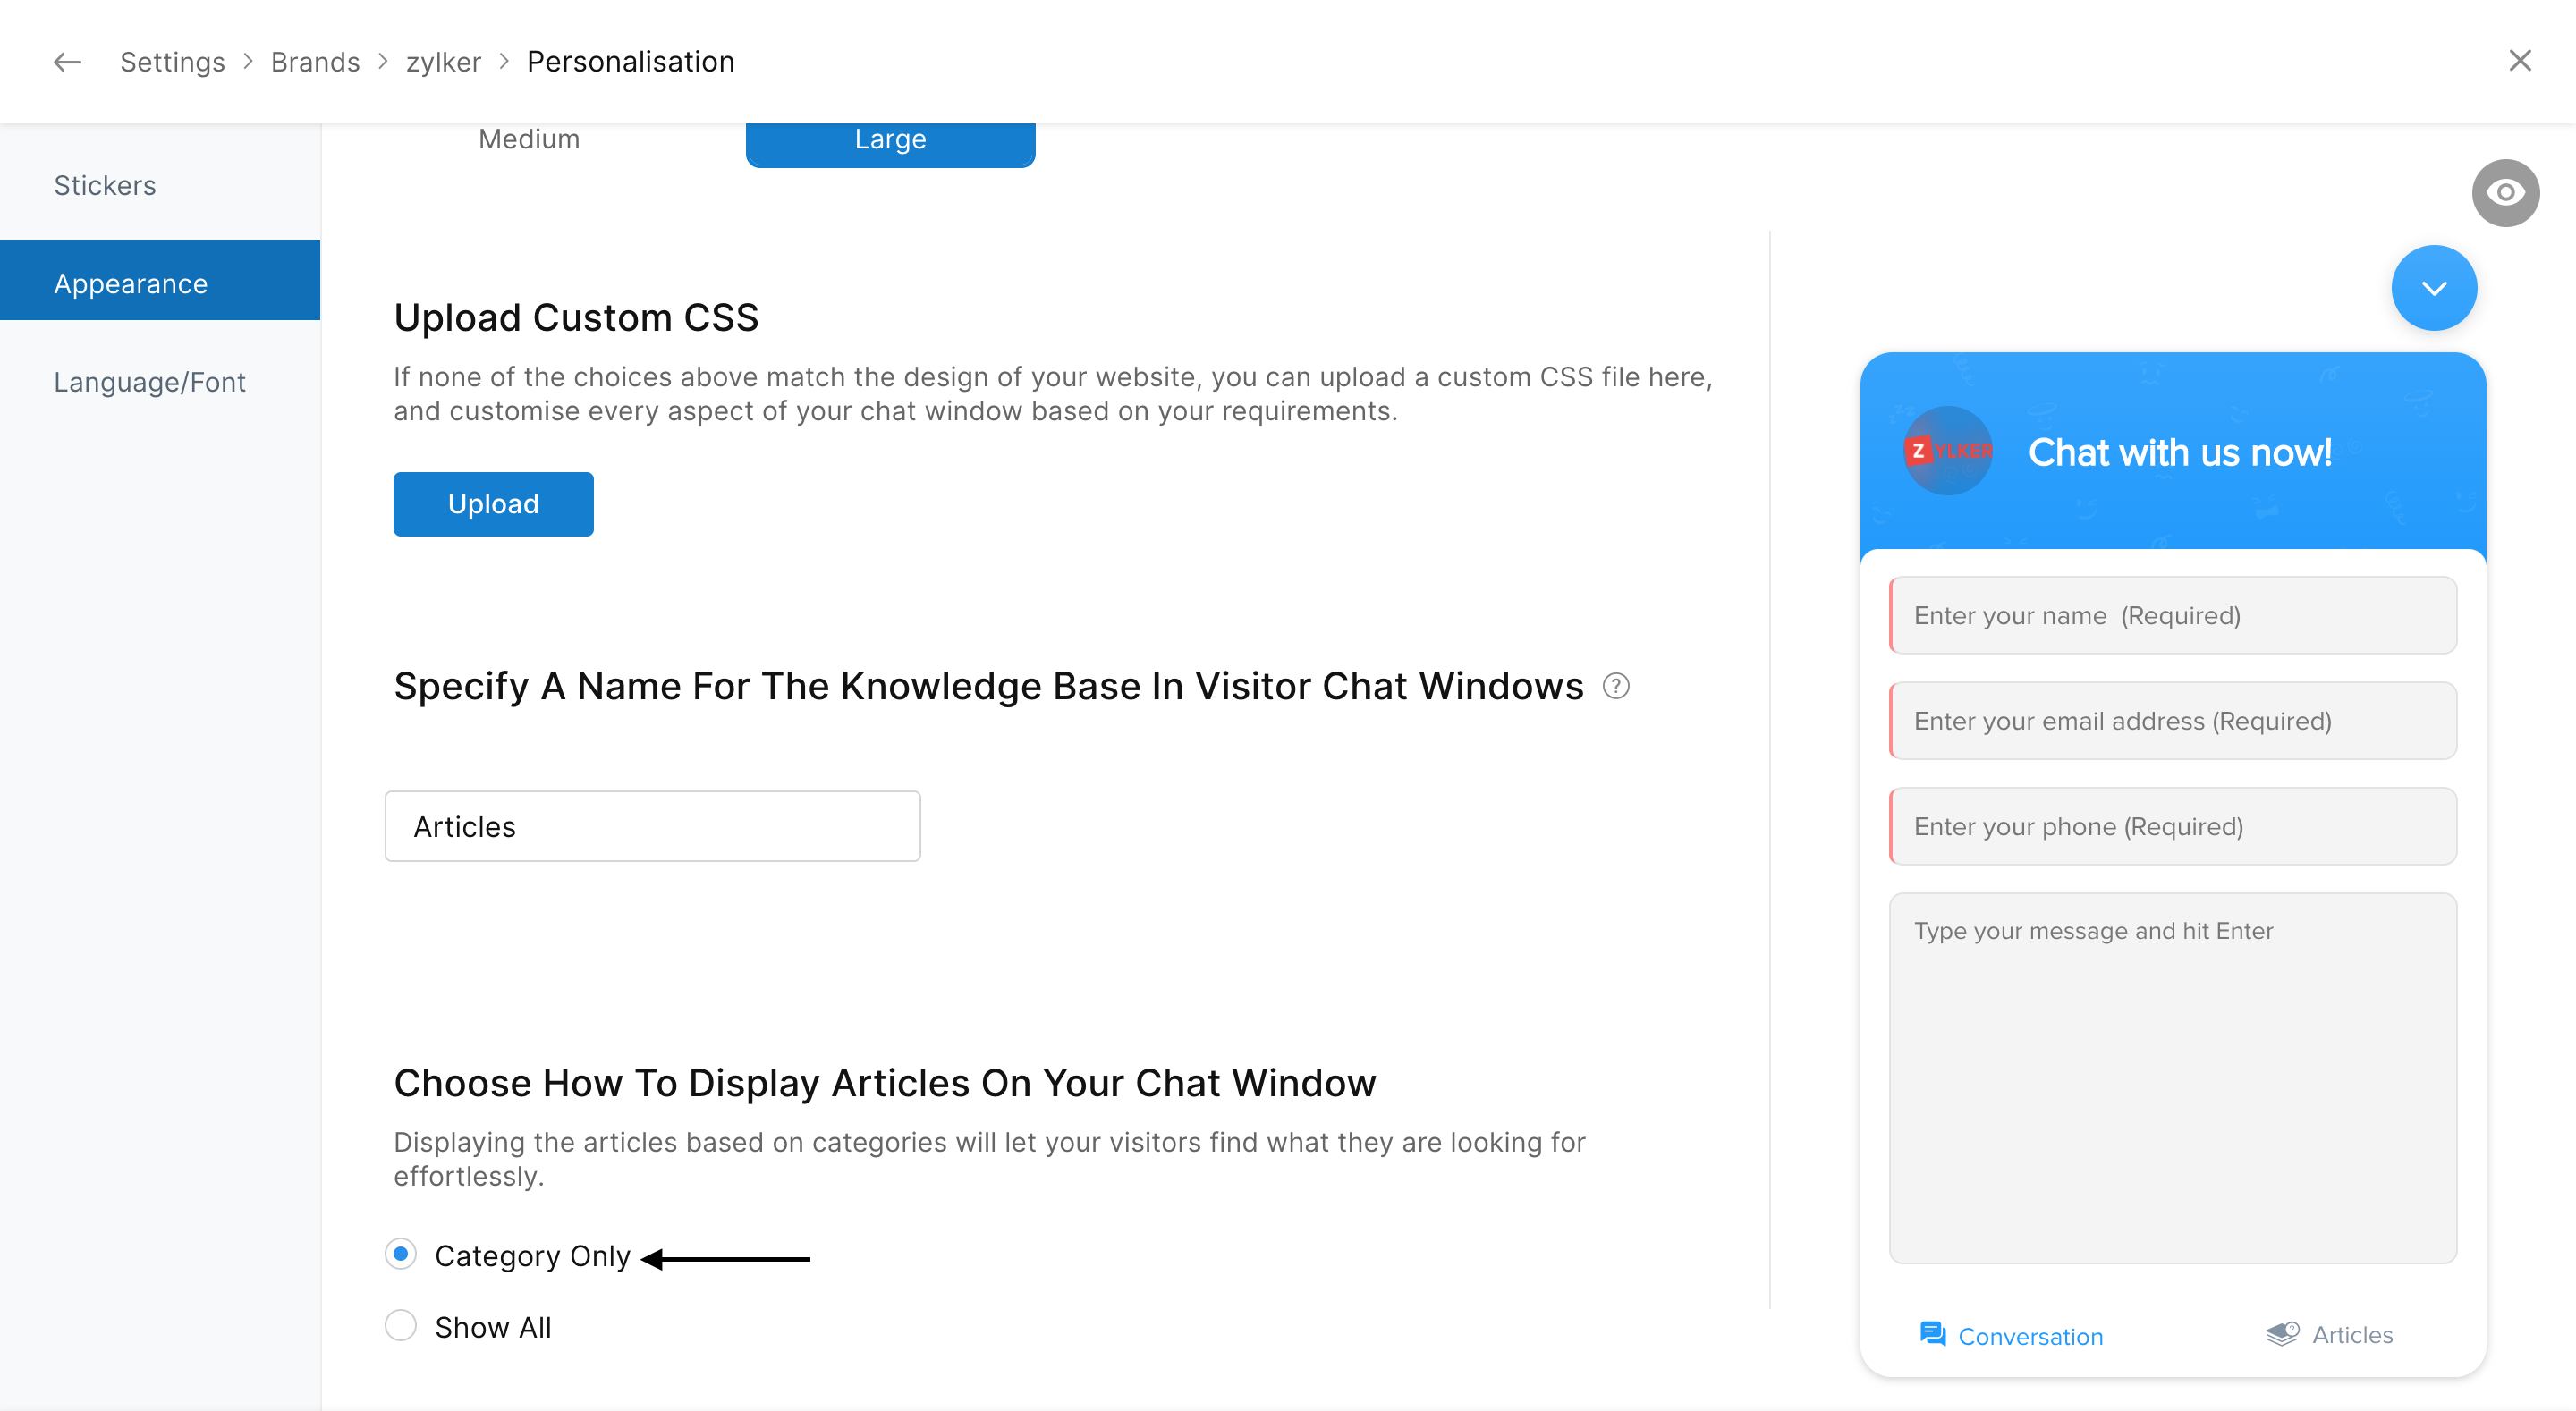
Upload custom CSS
Yes, it is possible to change the appearance of the chat window with your Custom CSS file. Refer to our Custom CSS guide and try customizing your chat window.
- In Settings > Brands > {Your brand name} > Personalize , navigate to Appearance on the left-hand side menu.
- Scroll down to Upload Custom CSS, click the upload button, pick the CSS file from your computer, and click Save .
- You can we a live preview of your CSS on the preview chat window on the right-hand side.
You can change the name of the Knowledge base based on the contents present inside. If you host only articles in the Knowledge base, you rename it to Articles, or if you have answered many visitor questions, you can name it FAQs.
- In the Appearance page, scroll down to Specify A Name For The Knowledge Base In Visitor Chat Windows, and change the text inside the input field.
- You can view the changes live on the preview window.
Categorize articles
If you wish to display the articles based on the categories assigned to while creating and enabling the visitors to find what they are looking for easily.
- In the Appearance page, scroll down to Choose How To Display Articles On Your Chat Window section, select Category only, and click Save .
 Change the chat window language
By default, the chat window uses the language available on your website. You can change the language if you wish to and use a comfortable language. If you have multiple sites for each country, then this option will be more helpful for you.
- In Settings > Brands > {Your brand name} > Personalize , navigate to Language/Font on the left-hand side menu.
- Select a language from the drop-down and click Save.
- If you do not find the language you are looking for or wish to change it according to your website. Then, choose the Website Language option at the top of the drop-down.
Customize the chat window font
Like Language, the chat window uses the website font by default. You can change that to match your preference.
- In Language/Fonts page, select your desired font under the Chat Window Font section, and click Save.
Related Articles
Live chat software for Facebook
You can now add Zoho SalesIQ Live Chat to your facebook fan pages and connect with the prospects instantly and close more deals. Configuring Zoho SalesIQ with your Facebook Login to your company facebook account and access the below mentioned link ...Configure Chat window
Setup your brand Add a name and description to your brand to make it identifiable and feel more personalized. If you wish to change your brand's name, you can do so by navigating to Settings > Brands > Your Brand > Configurations, Under Name your ...How to add live chat widget to WHMCS?
Connect to your webserver via the FTP program of your choice, and navigate to whmcs/template/X, where X is the name of the theme that you are using in WHMCS. Find the file footer.tpl and click on it. From the left side of your cPanel click ...Live chat software for Teamsupport
You can set up your predefined smart rules in Teamsupport for the chat transcript sent from Zoho SalesIQ on Chats and Missed chats. All attended chat transcript will be addressed with the subject line “Chats :” followed by the visitor question. All ...Live Chat Integration with Google Analytics
Overview Integrate Zoho SalesIQ with Google Analytics and track almost all the prime Zoho SalesIQ related actions and events right away from your Google Analytics dashboard. Integrate Zoho SalesIQ with Google analytics and track how your live chat ...